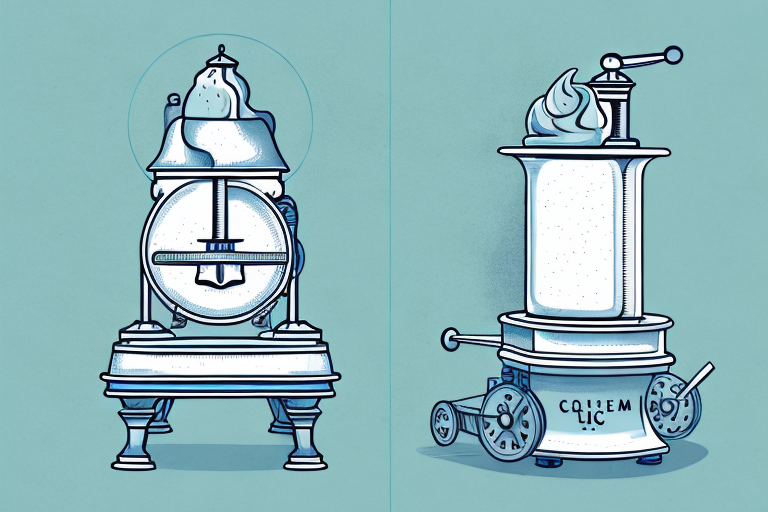
If you’re a lover of homemade ice cream, you know that using a classic ice cream maker is the best way to achieve that authentic taste and texture. However, it can be difficult to find a classic ice cream maker in good condition, especially one that has been used and loved for decades. That’s why restoring a classic ice cream maker can be worth the effort. In this guide, we’ll take you through all the steps you need to know to restore a classic ice cream maker for cooking.
Why restoring a classic ice cream maker is worth the effort
At first glance, restoring a classic ice cream maker may seem like a daunting task, and you may wonder if it’s worth the time and effort. However, a well-restored classic ice cream maker can be a beautiful and functional addition to your kitchen, offering a taste of nostalgia and a chance to create homemade ice cream just like your grandparents did.
Not only is restoring a classic ice cream maker a great way to preserve a piece of history, it can also be a rewarding and educational experience. By taking the time to restore a classic ice cream maker, you’ll gain an understanding of how it works and develop a close relationship with your kitchen equipment.
Restoring a classic ice cream maker can also be a sustainable choice. Instead of buying a new, mass-produced ice cream maker, restoring an old one can reduce waste and contribute to a more eco-friendly lifestyle. Additionally, many classic ice cream makers were built to last, with high-quality materials and craftsmanship that are hard to find in modern appliances.
Essential tools and materials for restoring a classic ice cream maker
Before you begin restoring your classic ice cream maker, you’ll need to gather some essential tools and materials. Some of the items you’ll need for this project include:
- Screwdriver
- Wrench
- Polishing cloth
- Sandpaper (various grits)
- Metal cleaner
- Rust remover
- Replacement parts (if necessary)
By having these tools and materials on hand, you’ll be able to tackle any issues that arise during the restoration process.
It’s important to note that not all classic ice cream makers are the same, and some may require additional tools or materials for restoration. For example, if your ice cream maker has a wooden exterior, you may need to purchase wood cleaner and varnish to restore its appearance. Additionally, if the motor or electrical components of your ice cream maker are damaged, you may need to seek the assistance of a professional electrician to ensure safe and proper repairs.
Step-by-step guide to disassembling and cleaning a classic ice cream maker
The first step in restoring your classic ice cream maker is to disassemble it. Start by removing any screws or bolts that are holding the machine together. Be sure to keep track of which parts go where, so you can easily reassemble the ice cream maker once it’s clean.
Next, you should thoroughly clean all the parts of the ice cream maker. This involves wiping down the components with a metal cleaner to remove any grime and dirt. You may also need to use sandpaper to remove any rust stains or other blemishes on the machine.
After cleaning the parts, it’s important to lubricate any moving parts of the ice cream maker. This will ensure that the machine runs smoothly and doesn’t get stuck during use. You can use a food-grade lubricant or oil to lubricate the parts, making sure to wipe away any excess oil to prevent it from getting into the ice cream mixture.
How to remove rust and stains from a classic ice cream maker
If you come across rust stains or other blemishes on your classic ice cream maker, don’t worry – these can be removed with a bit of elbow grease. Start by using a rust remover to get rid of the rust stains. You can then use sandpaper to smooth out any rough spots and make the machine look like new again.
However, if the rust stains are particularly stubborn, you may need to use a wire brush or steel wool to scrub them away. Be sure to wear gloves and protective eyewear when using these tools to avoid injury. Once the rust is removed, you can clean the ice cream maker with a mixture of warm water and dish soap. Rinse thoroughly and dry with a soft cloth.
To prevent future rust and stains, it’s important to keep your classic ice cream maker clean and dry when not in use. Store it in a cool, dry place and cover it with a cloth or plastic wrap to protect it from dust and moisture. If you notice any signs of rust or corrosion, address them promptly to prevent further damage to your machine.
Repairing or replacing parts of a classic ice cream maker
If you find that any parts of your classic ice cream maker are damaged beyond repair, you may need to replace them. Luckily, many classic ice cream makers have replacement parts available online or from specialty shops. Be sure to research your specific model and find the correct replacement parts before making any modifications to the machine.
It is important to note that repairing a classic ice cream maker can be a delicate process, especially if it is an antique or rare model. In this case, it may be best to seek the help of a professional repair person who specializes in vintage appliances. They will have the necessary expertise and tools to handle the repairs without causing further damage to the machine.
Additionally, regular maintenance can help prevent the need for major repairs or replacements. Make sure to clean the machine thoroughly after each use and store it in a dry, cool place. Lubricate any moving parts as needed and check for any signs of wear and tear. By taking good care of your classic ice cream maker, you can ensure that it will continue to churn out delicious frozen treats for years to come.
Tips for polishing and shining a restored classic ice cream maker
After you’ve cleaned and repaired your classic ice cream maker, you’ll want to give it a final polish to make it shine like new. You can use a polishing cloth and metal cleaner to give the ice cream maker a gleaming finish.
It’s important to note that you should avoid using abrasive cleaners or scrubbers on your restored classic ice cream maker, as they can scratch the surface and damage the finish. Instead, opt for a gentle cleaner and a soft cloth to avoid any potential damage. Additionally, if your ice cream maker has any intricate or hard-to-reach areas, you can use a toothbrush or cotton swab to carefully clean those areas.
How to reassemble and test a restored classic ice cream maker
Once you’ve finished cleaning and repairing your classic ice cream maker, it’s time to reassemble the machine. Be sure to follow the manufacturer’s instructions carefully and take your time during this process. Once the machine is reassembled, you can test it out by making a batch of homemade ice cream to ensure it’s in good working order.
When reassembling the ice cream maker, it’s important to pay attention to the placement of each part. Take note of how each piece fits together and refer to the manual if necessary. Make sure all screws and bolts are tightened securely, but be careful not to over-tighten them as this can cause damage to the machine.
After reassembling the ice cream maker, it’s a good idea to run a test cycle without any ingredients to ensure that everything is working properly. Listen for any unusual noises or vibrations and check that the machine is churning the mixture evenly. If you notice any issues, refer to the troubleshooting section of the manual or seek the advice of a professional.
Delicious recipes to try with your restored classic ice cream maker
Now that you’ve restored your classic ice cream maker, it’s time to put it to use and make some delicious homemade ice cream. There are countless recipes to try, from classic vanilla to unique flavor combinations like lavender and honey. Experiment with different ingredients and find a recipe that your family will love.
One tip for making the perfect homemade ice cream is to use high-quality ingredients. Fresh cream, whole milk, and real vanilla extract can make a huge difference in the flavor and texture of your ice cream. Don’t be afraid to splurge on these ingredients, as they will elevate your homemade ice cream to the next level. Additionally, consider adding mix-ins like chocolate chips, fruit, or nuts to add extra flavor and texture to your ice cream.
Caring for your restored classic ice cream maker to keep it in top condition
After putting all the time and effort into restoring your classic ice cream maker, you’ll want to ensure it stays in top condition for years to come. To care for your machine, be sure to clean it regularly to prevent any buildup of grime or dirt. You should also store the machine in a cool, dry place to prevent rust and keep it out of direct sunlight.
Another important aspect of caring for your restored classic ice cream maker is to use it regularly. This will help to keep the machine in good working order and prevent any parts from seizing up due to lack of use. Additionally, it’s important to use the machine properly and follow the manufacturer’s instructions to avoid any damage or malfunctions. By taking these steps, you can ensure that your restored classic ice cream maker will continue to produce delicious frozen treats for years to come.
Frequently asked questions about restoring a classic ice cream maker
Q: How long does it take to restore a classic ice cream maker?
A: The restoration process can vary depending on the condition of the machine and the amount of work that needs to be done. However, you should plan to spend several hours cleaning and repairing the ice cream maker.
Q: Can I restore a classic ice cream maker if I have no experience with DIY projects?
A: Yes! While some aspects of the restoration process may be challenging, anyone can learn the necessary skills with a bit of practice and patience.
Q: What are some common issues that need to be addressed during the restoration process?
A: Some common issues that need to be addressed during the restoration process include rusted or corroded parts, worn out gears or belts, and damaged electrical components. It is important to thoroughly inspect the ice cream maker before beginning the restoration process to identify any potential issues that need to be addressed.
Conclusion: Enjoy the rewards of restoring a classic ice cream maker!
Restoring a classic ice cream maker can be a fun and rewarding project that allows you to reconnect with the past and enjoy delicious homemade ice cream. By following the step-by-step guide and using the right tools and materials, you’ll be able to take an old, worn machine and transform it into a beautiful and functional addition to your kitchen.
Not only is restoring a classic ice cream maker a great way to enjoy homemade ice cream, but it can also be a valuable investment. Vintage ice cream makers are highly sought after by collectors and can fetch a high price if restored properly. Additionally, restoring an old machine is a sustainable choice that helps reduce waste and promotes a more eco-friendly lifestyle.
Finally, restoring a classic ice cream maker can be a great bonding experience for families and friends. Working together to bring an old machine back to life can create lasting memories and a sense of accomplishment. So why not gather your loved ones and embark on a fun and rewarding project that will result in delicious treats for years to come?