If you’re a fan of retro appliances, you might have considered restoring a classic toaster for your kitchen. Not only do vintage toasters have a certain charm, but they can often be more durable and reliable than modern appliances. Restoring a classic toaster can seem daunting, but with a bit of patience and the right tools, you can have a fully functioning and stylish appliance in your home. In this guide, we’ll take you through the steps needed to restore a classic toaster for cooking.
Why restoring a classic toaster is worth the effort
There are many reasons why restoring a classic toaster is worth the effort. First and foremost, they are often sturdier and more reliable than their modern counterparts. Vintage toasters were built to last, so with a bit of restoration work, you can enjoy an appliance that is not only durable, but also unique and stylish. Additionally, restoring a classic toaster can be a fun and rewarding project for those interested in DIY and vintage appliances.
Another reason why restoring a classic toaster is worth the effort is that it can be a more sustainable option. By giving new life to an old appliance, you are reducing waste and contributing to a more eco-friendly lifestyle. Additionally, vintage toasters often have simpler designs and fewer electronic components, making them easier to repair and maintain in the long run. This means that you can enjoy your restored toaster for many years to come, without having to constantly replace it with newer models.
The history of toasters and why classic models are still popular
The first electric toasters were invented in the early 1900s, but they didn’t become popular until the 1920s and 30s. Classic toasters from this era are still popular because they offer both functionality and aesthetic appeal. Many classic toasters were built with art deco designs, which look stylish and elegant in modern kitchens. Additionally, classic models were often designed for easy repair, making them ideal for those looking to restore a vintage appliance.
Another reason why classic toasters are still popular is their durability. Unlike modern toasters that are often made with plastic parts, classic toasters were built with sturdy materials like chrome and steel. This means that they can withstand years of use without breaking down or needing to be replaced. In fact, many vintage toasters are still in use today, passed down from generation to generation as family heirlooms.
Where to find vintage toasters for restoration
If you’re interested in restoring a classic toaster, your first step will be finding one to restore. You can often find vintage toasters at thrift stores, antique shops, and online marketplaces such as eBay. Look for toasters that are complete, with all of their parts intact. It’s best to avoid toasters that are badly rusted or corroded, as these may be more difficult to restore.
Another great place to find vintage toasters is at garage sales or estate sales. These sales often have hidden gems that are waiting to be discovered. Keep an eye out for advertisements in your local newspaper or online classifieds for upcoming sales in your area.
When searching for a vintage toaster, it’s important to do your research and know what you’re looking for. Some popular brands to look for include Sunbeam, Toastmaster, and General Electric. You may also want to consider the style and design of the toaster, as some vintage toasters have unique and interesting features that make them stand out.
Necessary tools and supplies for toaster restoration
Before you start restoring your classic toaster, you’ll need a few tools and supplies. You’ll need screwdrivers (both flathead and Phillips), pliers, a wire brush, steel wool, sandpaper, a multimeter, and electrical tape. Additionally, you may need replacement parts such as heating elements or cords, depending on the condition of your toaster.
It’s important to note that safety should always be a top priority when restoring electrical appliances. Make sure to unplug the toaster and wear protective gloves and eyewear when handling any electrical components. If you’re unsure about any aspect of the restoration process, it’s best to consult a professional or experienced hobbyist for guidance.
How to assess the condition of a vintage toaster before restoration
Before you start restoring your vintage toaster, you’ll need to assess its condition. Look for any obvious damage, such as missing or broken parts or rust and corrosion. Check the power cord and heating elements to see if they are functioning properly. If there are any electrical issues, you may need to consult with an electrician.
Another important factor to consider when assessing the condition of a vintage toaster is its age. Older toasters may have outdated wiring or heating elements that are no longer safe to use. Additionally, some vintage toasters may have been manufactured with materials that are now known to be hazardous, such as asbestos. It’s important to research the specific make and model of your toaster to determine if there are any safety concerns.
Finally, consider the overall aesthetic condition of the toaster. Are there any scratches, dents, or discoloration that may affect its value or appeal? If you plan on using the toaster for display purposes, these factors may be important to consider. However, if you plan on using the toaster for its intended purpose, the aesthetic condition may be less important than its functionality.
Disassembling the toaster: step-by-step instructions
The first step in restoring a vintage toaster is to disassemble it. Start by unplugging the toaster and removing any parts, such as crumb trays or bread guides. Then, use your screwdrivers to remove the screws that hold the casing together. Gently pull apart the casing, taking care not to damage any of the wires or components inside.
Once you have disassembled the toaster, it’s important to take note of the condition of the internal components. Look for any signs of wear and tear, such as frayed wires or rusted parts. If you notice any damage, you may need to replace these parts before reassembling the toaster.
Before reassembling the toaster, it’s also a good idea to clean all of the parts thoroughly. Use a soft cloth and a mild cleaning solution to wipe down the casing, heating elements, and other components. This will help to remove any dirt or grime that may have accumulated over time, and ensure that the toaster functions properly once it’s put back together.
Cleaning and polishing the exterior of a vintage toaster
With the toaster disassembled, you can start cleaning and polishing the exterior. Use your wire brush and steel wool to remove any rust or corrosion from the metal surfaces. Then, use sandpaper to smooth out any rough spots. When you’re finished, clean the exterior with a mild soap and water solution, and dry it thoroughly. If you want to add some shine, you can polish the metal with wax or a metal cleaner.
It’s important to note that you should never use abrasive cleaners or harsh chemicals on the exterior of a vintage toaster, as this can damage the finish and potentially harm the metal. Additionally, if you notice any deep scratches or dents in the metal, it may be best to leave them as is, as attempting to repair them could further damage the toaster.
Once you’ve finished cleaning and polishing the exterior, you can reassemble the toaster and test it out. If you find that it’s not working properly, it may be necessary to take it to a professional for repairs. With proper care and maintenance, however, your vintage toaster can continue to be a functional and stylish addition to your kitchen for years to come.
Replacing damaged or missing parts: a guide to sourcing and installing new components
If any parts on your vintage toaster are damaged or missing, you’ll need to replace them before you can use the appliance. Replacement parts can often be found online or at appliance repair shops. When installing new parts, be sure to follow the manufacturer’s instructions carefully, and take care not to damage any of the wiring or components.
It’s important to note that not all replacement parts are created equal. Some may be cheaper, but may not be of the same quality as the original parts. It’s always best to purchase parts from a reputable source to ensure that they are of good quality and will last for a long time.
Additionally, if you’re not comfortable with replacing parts yourself, it’s best to seek the help of a professional. They have the knowledge and experience to safely and effectively replace any damaged or missing parts, and can ensure that your vintage toaster is in good working condition.
Dealing with rust and corrosion on a vintage toaster
Rust and corrosion can be common issues with vintage toasters. If you notice areas of rust or corrosion on your toaster, use your wire brush and steel wool to remove as much of it as possible. Then, use sandpaper to smooth out any rough spots. To prevent further rust and corrosion, you can apply a coat of rust inhibitor or primer.
It’s important to note that if the rust or corrosion is extensive, it may be best to take your toaster to a professional for restoration. Attempting to remove large amounts of rust or corrosion on your own can cause further damage to the toaster.
Another way to prevent rust and corrosion on your vintage toaster is to keep it clean and dry. After each use, wipe down the toaster with a dry cloth and store it in a dry place. Avoid exposing the toaster to moisture or humidity, as this can accelerate the rusting process.
Restoring the heating elements: tips and tricks for getting them working again
The heating elements are a critical part of any toaster. If they are damaged or not functioning properly, the toaster won’t work. To restore the heating elements, start by cleaning them with a wire brush and steel wool to remove any rust or corrosion. Then, use a multimeter to test the resistance of the elements. If the resistance is too high or too low, you may need to replace the heating elements.
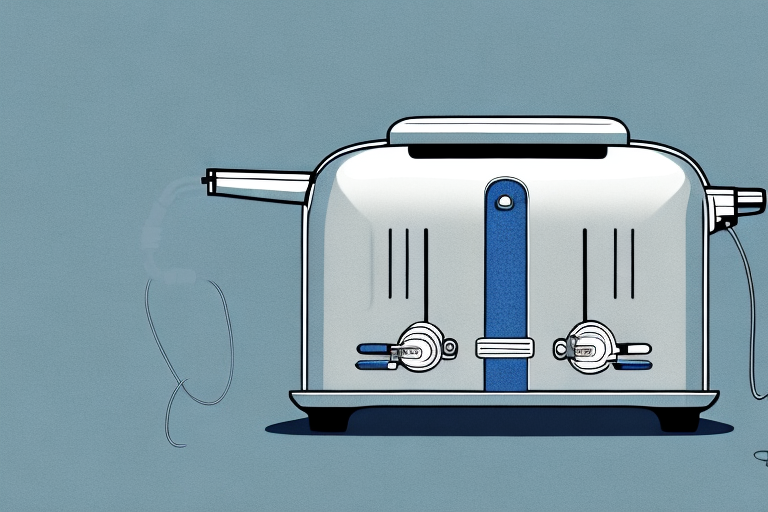
Wiring and electrical safety: what you need to know before restoring a vintage toaster
When restoring a vintage toaster, it’s important to understand how the wiring and electrical components work. If you’re not comfortable working with electricity, it’s best to consult with an electrician. Be sure to unplug the toaster before working on it, and wear protective gloves and eyewear.
Testing and troubleshooting your restored vintage toaster
When you’ve finished restoring your vintage toaster, it’s time to test it out. Plug it in and turn it on, and make sure that the heating elements are working properly. If there are any issues, consult with your multimeter to troubleshoot the problem.
Maintenance tips for keeping your classic toaster in top condition
To keep your restored vintage toaster in top condition, it’s important to maintain it properly. Clean the toaster regularly with a mild soap and water solution, and dry it thoroughly. Keep the bread guides and crumb tray clean and free of debris. If you notice any issues with the toaster, such as uneven toasting, consult with your multimeter to troubleshoot the problem.
Using your restored vintage toaster: cooking tips and recipes
Now that you’ve restored your vintage toaster, it’s time to start using it! Classic toasters are great for making toast, of course, but they can also be used for cooking a variety of dishes, from grilled cheese sandwiches to mini pizzas. Search online for vintage toaster recipes and experiment with different dishes to find your favorites.
Restoring a classic toaster can seem like a daunting task, but with the right tools and a bit of patience, it can be a fun and rewarding project. Whether you’re a fan of vintage appliances or just looking for a more durable and reliable toaster, restoring a classic model is worth the effort.