Do you have an old toaster oven lying around? Restoring a classic toaster oven for cooking can not only save you money but also give you a sense of satisfaction. If you are into DIY projects, this is a perfect weekend project for you. In this article, we’ll take you through a step-by-step guide on how to restore a classic toaster oven for cooking.
Why restoring a classic toaster oven is worth the effort
When you’re on a tight budget, restoring a classic toaster oven can be a great way to save money. Additionally, classic toaster ovens tend to be more durable and have better quality compared to their modern counterparts. By restoring a classic toaster oven, you can save yourself the cost of buying a new one while being environmentally conscious.
Moreover, restoring a classic toaster oven can be a fun and rewarding DIY project. It allows you to learn new skills and gain a sense of accomplishment by bringing an old appliance back to life. You can also customize the toaster oven to your liking by painting it a new color or adding unique features.
Identifying the components of a classic toaster oven
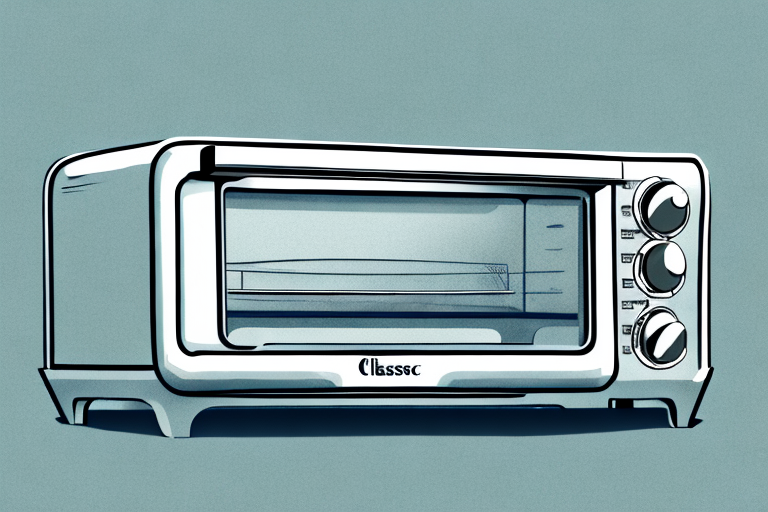
Before you begin, you need to understand the parts of a classic toaster oven. A typical toaster oven has six main components: the heating elements, thermostat, timer, crumb tray, baking pan, and rack. Each component plays a critical role in the oven’s operation and should be checked for proper functioning.
The heating elements are responsible for generating heat and are located at the top and bottom of the oven. They are made of metal and can become damaged over time, leading to uneven heating or complete failure. The thermostat is a temperature control device that regulates the heat output of the oven. It is important to ensure that the thermostat is accurate and functioning properly to prevent over or undercooking of food.
The timer is used to set the cooking time and will automatically turn off the oven when the time is up. It is important to make sure that the timer is working correctly to prevent overcooking or burning of food. The crumb tray is located at the bottom of the oven and collects any food debris or crumbs that fall during cooking. It should be removed and cleaned regularly to prevent buildup and potential fire hazards.
Understanding the common issues with classic toaster ovens
The biggest challenge with old toaster ovens is that they may have some operational issues such as malfunctioning heating elements, inaccurate temperature readings, inaccurate timer, or stuck controls. While some of these issues may be caused by the age of the appliance, others may be due to poor handling or lack of maintenance.
Another common issue with classic toaster ovens is uneven toasting. This can be caused by a variety of factors such as uneven heating elements, crumbs or debris blocking the heating elements, or a malfunctioning thermostat. To prevent this issue, it is important to regularly clean the toaster oven and ensure that it is properly maintained. Additionally, it is recommended to rotate the food halfway through the toasting process to ensure even browning.
Tools required for restoring a classic toaster oven
To restore a classic toaster oven, you’ll need some basic tools like a screwdriver, pliers, wire cutters, a multimeter, sandpaper, and paint. Having a pair of gloves and safety glasses is also recommended to ensure your safety while working.
Before starting the restoration process, it’s important to assess the condition of the toaster oven. If it’s heavily rusted or damaged, you may need additional tools like a metal grinder or welder to repair it. It’s also important to have a good workspace with proper ventilation and lighting to make the restoration process easier.
Once you have all the necessary tools, you can start by disassembling the toaster oven and cleaning all the parts thoroughly. You can use a degreaser or vinegar solution to remove any grease or grime buildup. After cleaning, you can use sandpaper to remove any rust or corrosion on the metal parts. Once the metal parts are clean and smooth, you can apply a coat of paint to protect them from further rusting.
Step-by-step guide to disassembling a classic toaster oven
The first step in restoring a classic toaster oven involves disassembling it. This involves removing the knobs, screws, and any other attachments to access the internal components. Take your time to document where each component came from to avoid confusion during reassembly.
Once you have removed all the necessary components, it is important to clean them thoroughly. Use a soft-bristled brush to remove any dust or debris that may have accumulated over time. You can also use a mild cleaning solution to remove any stubborn stains or grease. Make sure to dry all the components completely before reassembling the toaster oven.
Cleaning and sanding the parts of a classic toaster oven
After disassembly, the parts of the toaster oven need to be cleaned thoroughly. Soak the parts in a cleaning solution for a few hours, then use a brush to scrub off any remaining grime. Once the parts are clean, you’ll need to sand them thoroughly to get rid of rust and other surface imperfections.
It’s important to note that not all parts of a classic toaster oven can be sanded. Some parts, such as the heating elements, should not be sanded as it can damage the surface and affect the performance of the oven. It’s best to consult the manufacturer’s instructions or a professional before sanding any parts of the toaster oven.
Replacing damaged or worn-out parts in a classic toaster oven
If any of the toaster oven’s components are damaged or worn out, you’ll need to replace them. Be sure to order the right parts for your specific model. Most parts are readily available online, and you can easily replace them by following the manufacturer’s instructions.
Before attempting to replace any parts, make sure to unplug the toaster oven and let it cool down completely. This will prevent any potential accidents or injuries. Additionally, it’s important to use the correct tools for the job, such as screwdrivers or pliers, to avoid damaging the parts or the toaster oven itself.
If you’re unsure about how to replace a specific part, consult the manufacturer’s manual or seek assistance from a professional. Attempting to replace a part without proper knowledge or experience can be dangerous and may cause further damage to the toaster oven.
Painting and refurbishing the exterior of a classic toaster oven
Once the internal components are fixed, you can move on to refurbishing the exterior of the toaster oven. Start by applying a layer of primer to ensure that the paint adheres properly. Then, paint the oven, and once the paint is dry, apply a protective coating to prevent scratches and maintain the finish.
When choosing a paint color for your toaster oven, consider the overall aesthetic of your kitchen. You may want to choose a color that complements your existing appliances or matches your kitchen decor. Additionally, make sure to use a high-temperature paint that can withstand the heat generated by the toaster oven.
Another important aspect of refurbishing the exterior of a toaster oven is cleaning and polishing any metal parts. Use a metal cleaner and a soft cloth to remove any rust or grime from the metal surfaces. Then, apply a metal polish to restore the shine and protect the metal from future damage.
Assembling and testing the restored classic toaster oven
Once the painting is done, it’s time to reassemble the toaster oven. Follow the steps you documented when taking apart the appliance. Once everything is in place, test the oven to ensure that all the components are working correctly.
It’s important to note that if any components are not working correctly, it’s best to replace them before using the toaster oven. This will ensure that the appliance is safe to use and will function properly. Additionally, it’s a good idea to clean the interior of the toaster oven before using it, as any leftover debris or dust can affect the taste of the food being cooked.
Tips for maintaining your restored classic toaster oven
Maintaining a restored toaster oven is critical to ensuring its longevity. Always clean the crumb tray, and wipe down the exterior of the oven after every use. Additionally, check the heating elements regularly for signs of wear and tear.
Another important tip for maintaining your restored classic toaster oven is to avoid using harsh chemicals or abrasive materials when cleaning it. Stick to mild soap and water, and use a soft cloth or sponge to avoid scratching the surface. It’s also a good idea to periodically check the power cord and plug for any damage or fraying, and to replace them if necessary. By following these simple maintenance tips, you can keep your restored toaster oven in top condition for years to come.
Using your restored classic toaster oven to cook delicious meals
Now that you’ve successfully restored your classic toaster oven, you can use it to prepare a variety of meals. Whether it’s toasting bread, reheating pizza, or baking cookies, there’s no limit to the delicious meals you can make with a toaster oven.
One of the advantages of using a toaster oven is that it heats up quickly and uses less energy than a full-sized oven. This makes it a great option for cooking small meals or for when you don’t want to heat up your entire kitchen. You can also use it to roast vegetables, bake small casseroles, or even cook a small chicken. With a little creativity, your restored classic toaster oven can become a versatile tool in your kitchen.
Upcycling ideas for repurposing a restored classic toaster oven
If you have a creative mind, there are plenty of ways to repurpose your toaster oven once it’s outlived its usefulness in the kitchen. You could use it as a plant pot, storage box, or even an aquarium!
Another great way to repurpose a toaster oven is to turn it into a mini art studio. You can remove the heating elements and use the interior as a small workspace for painting or crafting. The compact size makes it perfect for small projects and it can easily be stored away when not in use.
If you’re feeling adventurous, you could also transform your toaster oven into a unique piece of furniture. With a little bit of creativity and some DIY skills, you can turn it into a stylish side table or even a funky lamp. The possibilities are endless!
Common mistakes to avoid when restoring a classic toaster oven
When restoring a classic toaster oven, there are a few common mistakes you should avoid. For instance, you should never try to repair any of the internal components while they’re still connected to a power source. Additionally, avoid using harsh chemicals or abrasive materials when cleaning the components.
Another mistake to avoid is using incorrect replacement parts. It’s important to use parts that are specifically designed for your toaster oven model to ensure proper functioning. Using the wrong parts can cause damage to the oven and potentially be dangerous.
It’s also important to properly reassemble the toaster oven after cleaning or repairing it. Make sure all components are securely in place and that any screws or bolts are tightened to the appropriate level. Failure to properly reassemble the oven can result in malfunction or even fire.
Final thoughts on restoring a classic toaster oven for cooking
Restoring a classic toaster oven is a satisfying DIY project that can save you money and give you a sense of accomplishment. By following the steps outlined above, you can breathe new life into an old appliance, and enjoy delicious meals for years to come. So, go ahead, grab your tools, and get to work!