Are you a fan of homemade bread but looking for a unique way to bake it? Have you ever thought about restoring a retro bread maker for cooking? Whether you want to relive fond childhood memories or add a vintage touch to your kitchen, restoring a retro bread maker is a rewarding experience that can result in delicious homemade bread. In this article, we will cover everything you need to know about restoring a retro bread maker for cooking.
Why restoring a retro bread maker is worth the effort
Restoring a retro bread maker may seem like a tedious process, but it is worth the effort for several reasons. First, vintage bread makers can be quite durable and long-lasting compared to modern appliances. In addition, restoring a retro bread maker allows you to own a unique piece of history that sets your kitchen apart from others. Lastly, using a retro bread maker can provide a sense of nostalgia and bring back memories of simpler times.
Another reason why restoring a retro bread maker is worth the effort is that it can be a fun and rewarding DIY project. By taking the time to clean, repair, and refurbish an old bread maker, you can learn new skills and gain a sense of accomplishment. Additionally, restoring a retro bread maker can be a sustainable choice, as it reduces waste and promotes reuse of existing resources. Overall, restoring a retro bread maker is a great way to combine your love for vintage appliances, DIY projects, and sustainable living.
A brief history of bread making machines
Bread making machines have been around for centuries, dating back to the Roman Empire. However, the first electric bread maker was not invented until 1986 by Matsushita Electric Industrial Co. This marked the rise of at-home bread making and eventually led to the creation of modern bread makers we see today. Retro bread makers often incorporate older technology and design that may not be found in modern appliances.
Since the invention of the first electric bread maker, there have been many advancements in the technology used in bread making machines. Some modern bread makers come with features such as automatic yeast dispensers, gluten-free settings, and even the ability to make jam or pasta dough. Additionally, bread makers have become more energy-efficient and environmentally friendly over time.
Despite the convenience of bread making machines, some people still prefer to make bread by hand. This is because making bread by hand allows for more control over the ingredients and the final product. Additionally, some people find the process of kneading and shaping the dough to be therapeutic and enjoyable.
How to identify a retro bread maker and its parts
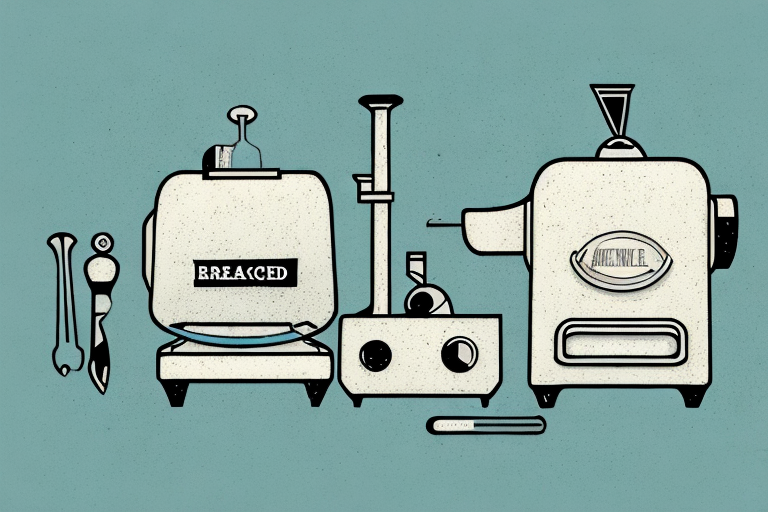
Identifying a retro bread maker can be challenging, but there are a few key characteristics that distinguish them from modern appliances. Retros often have a unique design that may include metallic surfaces, bold colors, and a more substantial build. To identify the parts of a retro bread maker, consult the user manual or online resources and take note of any unique features or quirks of your particular appliance.
One additional way to identify a retro bread maker is to look for any branding or logos that may be present on the appliance. Many retro bread makers were produced by well-known brands such as Sunbeam or Oster, and may feature the brand’s logo prominently on the appliance. Additionally, some retro bread makers may have a more simplistic design with fewer buttons or features compared to modern appliances, which can also help with identification.
Tools and supplies needed for restoring a retro bread maker
When it comes to restoring a retro bread maker, you will need a few tools and supplies. Some of the necessary tools may include a screwdriver, pliers, and a wire brush. You may also need supplies such as lubricant, lithium grease, and cleaning cloths to help clean and restore parts.
Additionally, it is important to have a multimeter to test electrical components and ensure they are functioning properly. You may also need replacement parts such as belts, gears, and heating elements, depending on the condition of the bread maker. It is recommended to have a manual or guide specific to your bread maker model to assist with the restoration process. With the right tools and supplies, restoring a retro bread maker can be a fun and rewarding project.
Step-by-step guide to disassembling a retro bread maker
The first step in restoring a retro bread maker is to disassemble it. Follow the instructions in the user manual to carefully remove any necessary parts. Be sure to label each part as you remove it, so you know where to replace it later. If the user manual is unavailable, consult online resources or reach out to fellow bread-making enthusiasts for guidance.
Once you have disassembled the bread maker, it’s important to clean each part thoroughly. Use a soft cloth and mild soap to remove any dirt or grime that may have accumulated over time. Pay special attention to the heating element and the bread pan, as these are the parts that come into contact with the dough and can affect the quality of the bread.
After cleaning, inspect each part for any signs of wear or damage. If any parts are broken or worn out, they will need to be replaced before reassembling the bread maker. You can order replacement parts online or from a local appliance store. Once you have all the necessary parts, carefully reassemble the bread maker in the reverse order of disassembly, following the instructions in the user manual or online resources.
Tips for cleaning and polishing the components of a retro bread maker
Cleaning and polishing the components of a retro bread maker is a crucial step in the restoration process. Start by cleaning each component with warm, soapy water and a soft brush or sponge. For especially grimy or challenging parts, use a wire brush or toothbrush. Once all parts are clean, polish them with a soft cloth and a specialized metal polish if necessary.
It is important to note that not all components of a retro bread maker can be cleaned and polished in the same way. For example, the heating element should never be polished, as it can damage the surface and affect its functionality. Instead, use a damp cloth to wipe it down and remove any debris.
Additionally, if you are unsure about how to clean or polish a specific component, consult the manufacturer’s instructions or seek advice from a professional. Improper cleaning or polishing techniques can cause damage to the components and potentially render the bread maker unusable.
How to troubleshoot common problems in a retro bread maker
Even after restoration, you may encounter some common problems with your retro bread maker. Some of these issues may include leaking oil, overheating, or a broken kneading paddle. Consult the user manual, online resources, or reach out to a local repair shop for guidance on how to address any issues that may arise.
One additional common problem that may occur with a retro bread maker is unevenly baked bread. This can be caused by a variety of factors, such as incorrect measurements of ingredients, uneven distribution of ingredients in the bread pan, or a malfunctioning heating element. To troubleshoot this issue, try adjusting the recipe to ensure accurate measurements, evenly distribute ingredients in the bread pan, and check the heating element for any signs of damage or malfunction. If the problem persists, consider reaching out to a professional for further assistance.
Replacing worn-out or broken parts in a retro bread maker
If you encounter any worn-out or broken parts while restoring your retro bread maker, it is essential to replace them. Check online or reach out to a local repair shop for replacement parts. Be sure to only use parts that are compatible with your specific appliance to avoid any further issues.
It is important to note that some parts may be more difficult to replace than others. For example, if the heating element is broken, it may require more technical knowledge and expertise to replace. In this case, it may be best to seek the help of a professional repair person. Additionally, if you are unsure about how to properly install a replacement part, be sure to consult the appliance’s manual or seek guidance from a professional.
How to reassemble a retro bread maker after restoration
After cleaning, polishing, troubleshooting, and replacing any necessary parts, it’s time to reassemble your retro bread maker. Follow the instructions provided in the user manual or consult online resources for guidance. Make sure to take your time and be careful during this process to avoid causing any damage.
Before reassembling your retro bread maker, it’s important to ensure that all the parts are completely dry. Any moisture left on the parts can cause rust or damage to the electrical components. You can use a clean, dry cloth or air dry the parts for a few hours before proceeding with the reassembly.
When reassembling the bread maker, it’s important to pay attention to the order in which the parts are assembled. Some parts may need to be inserted in a specific order, and if done incorrectly, it can cause the bread maker to malfunction. It’s also important to ensure that all the screws and bolts are tightened properly, but not too tight as it can cause damage to the parts or strip the threads.
Testing the functionality of your restored retro bread maker
Once reassembled, it’s time to test the functionality of your restored retro bread maker. Follow the user manual and make sure all necessary parts are in place. Start with a simple recipe to ensure that your retro bread maker is functioning correctly before moving onto more advanced recipes.
It’s important to note that if your restored retro bread maker is not functioning correctly, it may be due to worn out or damaged parts. In this case, it’s best to consult with a professional or purchase replacement parts to ensure the longevity of your bread maker. Regular maintenance and cleaning can also help to prevent future issues and keep your retro bread maker in top working condition.
Tips for maintaining your restored retro bread maker in good condition
To ensure that your restored retro bread maker stays in good condition, there are a few maintenance tips to keep in mind. After each use, clean the components with warm, soapy water and a soft brush or sponge. Avoid using harsh chemicals or abrasive sponges that could damage the appliance. Additionally, store your retro bread maker in a dry place away from direct sunlight or moisture.
Ideas for using your restored retro bread maker to make delicious homemade breads
After restoring and testing your retro bread maker, it’s time to start baking delicious homemade breads. Classic white bread, whole wheat, and sourdough are popular and satisfying choices. You can even experiment with different flours and ingredients to create unique and personalized bread recipes.
Frequently asked questions about restoring and using retro bread makers
Some frequently asked questions about restoring and using retro bread makers may include how to troubleshoot common problems, how to clean and maintain components, and where to find replacement parts. Consult online resources or reach out to other bread-making enthusiasts or local repair shops for guidance on any questions you may have.
Conclusion: Why restoring and using a vintage bread maker is a rewarding experience
Restoring and using a vintage bread maker is a rewarding experience that provides a unique way to bake homemade bread. Not only do retro bread makers offer unique designs and features, but they also allow you to connect with the past and add a vintage touch to your kitchen. With a little time and effort, restoring a retro bread maker can result in delicious and satisfying bread for years to come.