Antique hand blenders have a charm and character that modern blenders simply cannot match. Whether you’re a collector or a cooking enthusiast, restoring a vintage hand blender can be a rewarding and satisfying experience. In this article, we will explore the steps and tools necessary to restore an antique hand blender for use in your kitchen.
Exploring the history of antique hand blenders
Before we dive into the process of restoring an antique hand blender, let’s take a moment to appreciate the history behind these devices. The first hand-cranked blender was invented in 1922 and was affectionately known as the “Egg Beater.” These blenders were used to mix and blend ingredients in the kitchen before the advent of electric mixers. The Egg Beater was a popular kitchen gadget and has since evolved into the modern electric blender that we use today. However, many collectors and cooking enthusiasts prefer the charm and simplicity of a vintage hand blender.
Antique hand blenders were often made with high-quality materials such as stainless steel and cast iron, making them durable and long-lasting. They were also designed with intricate details and patterns, making them not only functional but also aesthetically pleasing. In addition, antique hand blenders were often passed down through generations as family heirlooms, adding sentimental value to their already impressive history. Today, antique hand blenders are highly sought after by collectors and vintage enthusiasts, and can often be found at antique shops and online marketplaces.
Why restore an antique hand blender instead of buying a new one?
Restoring an antique hand blender is not only a nod to history or a fun DIY project to tackle, but it can also be a practical choice for cooking enthusiasts. First, restored antique hand blenders are often more affordable than new high-quality blenders. Additionally, vintage blenders are often sturdier and more durable than their plastic counterparts today. Finally, by restoring an antique hand blender, you’re giving new life to a piece of culinary history, and there is something special about preserving and using an item with such character.
Another advantage of restoring an antique hand blender is that it can be a more sustainable option. Instead of contributing to the production of new plastic blenders, you’re repurposing and reusing an existing item. This can help reduce waste and lessen your environmental impact. Additionally, restoring an antique hand blender can be a rewarding experience, as you learn about the history and craftsmanship of the item, and gain a sense of satisfaction from bringing it back to life.
Understanding different types of antique hand blenders and their parts
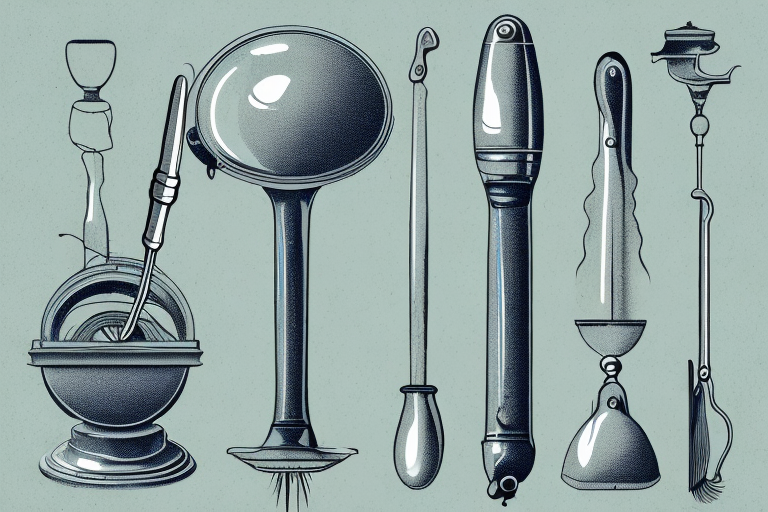
Before beginning the restoration process, it’s essential to understand the different types of antique hand blenders and the parts that make them work. The two most common antique hand blenders are the rotary and the Dazey. The rotary blender is constructed of a motorized base and a removable blending arm, while the Dazey is a manual crank mixer. Both types of blenders contain various parts, including a motor, gears, blades, and beaters, depending on the model.
In addition to the parts mentioned above, some antique hand blenders may also have additional attachments, such as a whisk or a chopper. These attachments can be used to perform different tasks, such as whipping cream or chopping nuts. It’s important to identify all the parts and attachments of an antique hand blender before attempting to restore or use it, as this will ensure that it is used correctly and safely. Additionally, it’s important to note that some antique hand blenders may require special care and maintenance, such as oiling the gears or sharpening the blades, to ensure their longevity and optimal performance.
Necessary tools and supplies for restoring an antique hand blender
To begin restoring your antique hand blender, you will need a few basic tools and supplies. These include a set of screwdrivers, needle-nose pliers, wire brushes, sandpaper, metal polish, primer, paint, and masking tape. You may also want to invest in a rust remover solution if your blender has significant rust damage.
Before you begin the restoration process, it’s important to thoroughly clean your antique hand blender. Use a mild soap and warm water to remove any dirt or grime that has accumulated over time. Dry the blender completely before moving on to the restoration process.
When restoring an antique hand blender, it’s important to take your time and work carefully. Use the appropriate tools and supplies for each step of the process, and don’t rush through any steps. With patience and attention to detail, you can restore your antique hand blender to its former glory.
How to clean and remove rust from an antique hand blender
Now that you have your tools ready, it’s time to dive into the restoration process. First, begin by disassembling the blender and cleaning each part thoroughly. Use a wire brush to remove any rust or corrosion from the metal parts. If your blender has significant rust damage, you may need to use a rust remover solution, such as a vinegar solution or a commercial rust remover. Be sure to rinse the parts thoroughly and dry them before proceeding.
After cleaning and removing rust from the blender, it’s important to lubricate the moving parts to ensure smooth operation. Apply a small amount of oil or grease to the gears and bearings, being careful not to overdo it. Reassemble the blender and test it out to make sure it’s working properly. If you notice any issues, such as unusual noises or difficulty turning the blades, you may need to disassemble and clean the blender again or seek professional help.
Restoring the blades and motor of an antique hand blender
After removing any rust or corrosion, you can focus on restoring the blades and motor of the hand blender. Use a metal polish to clean the blades and bring them back to their original luster. If the motor is not running correctly, you may need to replace the gears or the motor itself. Be sure to follow the manufacturer’s instructions when dismantling and reassembling the motor.
It is important to note that antique hand blenders may have different specifications and requirements compared to modern ones. Therefore, it is recommended to consult with a professional or an experienced collector before attempting any restoration work. Additionally, it is crucial to use the appropriate tools and materials to avoid damaging the antique hand blender.
Once the blades and motor are restored, it is essential to test the hand blender before using it. Check if the blades are spinning correctly and if the motor is running smoothly. If there are any issues, it is best to address them immediately to prevent further damage to the antique hand blender. With proper care and maintenance, an antique hand blender can be a valuable addition to any kitchen and can last for generations to come.
Painting and refinishing an antique hand blender
Once you have restored all the parts of your antique hand blender, you can choose to paint and refinish it to give it a finished look. Begin by applying a layer of primer and paint using masking tape to keep the paint off any areas you do not want to be painted. Allow the paint to dry thoroughly before reassembling the blender.
When choosing a paint color, consider the overall aesthetic of your kitchen or the room where the blender will be displayed. You may want to choose a color that complements the existing decor or a bold color that makes the blender stand out as a statement piece. Additionally, you can add a clear coat of varnish or lacquer to protect the paint and give the blender a glossy finish.
It’s important to note that refinishing an antique hand blender may decrease its value to collectors. If you plan on selling the blender in the future, it’s best to leave it in its original condition. However, if you plan on using the blender for personal use or display, refinishing it can give it a new life and make it a unique addition to your collection.
How to reassemble the restored antique hand blender
Now that all your parts are cleaned and polished, it’s time to reassemble the blender. Be sure to follow the manufacturer’s instructions to ensure that each part is correctly aligned and secured. Tighten all screws and ensure that the motor is working correctly before using your restored antique hand blender.
It’s important to note that antique hand blenders may have different reassembly instructions than modern blenders. Take your time and be patient during the reassembly process, as some parts may be delicate and require extra care. If you encounter any difficulties or are unsure about how to proceed, consult a professional or reach out to the manufacturer for guidance. With proper reassembly, your restored antique hand blender can be a functional and beautiful addition to your kitchen.
Tips for maintaining and caring for your restored antique hand blender
To ensure that your restored antique hand blender lasts for years to come, it’s important to care for it correctly. Be sure to clean the blades and motor after each use and store it in a dry, cool place when not in use. Additionally, avoid submerging the blender in water or any liquids, as this can damage the motor and electrical components.
Creating delicious meals using your restored antique hand blender
With your antique hand blender fully restored and functioning, it’s time to put it to use. These blenders are fantastic for creating smoothies, soups, and sauces. Remember to use the correct blades and attachments for each task and to never overload the blender.
Displaying your restored antique hand blender as a decorative piece in your kitchen
Not only is your restored antique hand blender a functional kitchen gadget, but it can also be a beautiful decorative piece for your kitchen. Display it on a shelf or in a glass-front cabinet as a nod to culinary history and a conversation starter with guests.
Where to find antique hand blenders for restoration purposes
If you’re interested in restoring an antique hand blender but don’t know where to find one, try checking online marketplaces such as eBay or visiting antique stores in your area.
Common mistakes to avoid when restoring an antique hand blender
When restoring an antique hand blender, it’s important to avoid common mistakes to ensure that you don’t damage or break any parts. One of the most significant mistakes is using the wrong tools or using tools incorrectly. Be sure to research and follow the manufacturer’s instructions when restoring your blender. Additionally, be careful when working around electrical components.
Frequently asked questions about restoring an antique hand blender
Q: Is it safe to use a restored antique hand blender?A: Yes, it is safe to use a restored antique hand blender. However, be sure to follow the manufacturer’s instructions when using and maintaining the blender.Q: How much does it cost to restore an antique hand blender?A: The cost of restoring an antique hand blender varies depending on the condition of the blender and the tools and supplies needed for restoration. However, restoring an antique hand blender is often more affordable than buying a new high-quality blender.Q: Can I use my restored antique hand blender to blend hot liquids?A: Yes, you can use your restored antique hand blender to blend hot liquids. However, be sure to follow the manufacturer’s instructions and never overload the blender.
Restoring an antique hand blender is a practical and satisfying DIY project for cooking enthusiasts and collectors alike. By following the steps outlined in this article and taking proper care of your restored blender, you can enjoy using it in your kitchen for years to come.