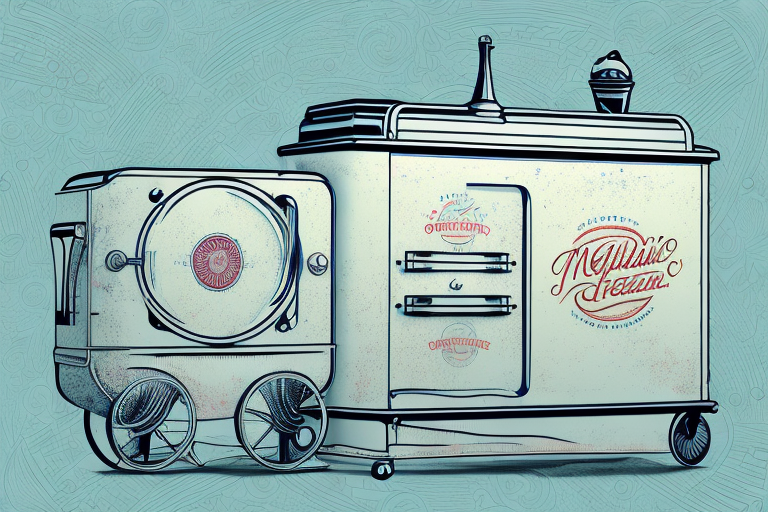
Antique ice cream freezers are a delightful piece of machinery that has withstood the test of time. They are not only a collector’s item but are also functional, making for a unique cooking experience. However, restoring an antique ice cream freezer can seem like an overwhelming task, but with the right tools, materials, and time, it’s a doable project.
Why antique ice cream freezers are worth restoring
Before you start restoring your antique ice cream freezer, you need to understand why it’s worth the effort. Unlike modern ice cream makers, antique ones create a unique texture and taste that cannot be replicated. Additionally, it’s a statement piece that adds character and charm to your home, making it worth the investment.
Another reason why antique ice cream freezers are worth restoring is that they are often made with high-quality materials and craftsmanship that are no longer used in modern appliances. Restoring an antique ice cream freezer not only brings it back to its former glory but also preserves a piece of history and tradition. It’s a way to connect with the past and appreciate the ingenuity and creativity of our ancestors.
Identifying the type and condition of your antique ice cream freezer
Antique ice cream freezers come in various types and conditions, which influence the restoration process. Before diving into the restoration process, ensure you have identified the type and condition of the ice cream freezer to understand what needs to be done. Research online or consult an expert for guidance.
One of the most common types of antique ice cream freezers is the hand-cranked freezer. These were popular in the late 1800s and early 1900s and were operated by turning a crank to churn the ice cream. Another type is the electric freezer, which was introduced in the 1920s and became more common in the 1930s. These freezers were powered by electricity and had a motor to churn the ice cream.
The condition of the antique ice cream freezer is also important to consider. Some may have rust or other damage that needs to be repaired before restoration can begin. Others may be missing parts or have non-functioning components that need to be replaced. It is important to thoroughly inspect the freezer and make a list of any necessary repairs or replacements before beginning the restoration process.
Tools and materials required for restoring an antique ice cream freezer
To restore an antique ice cream freezer, you will require a few tools and materials, including sandpaper, primer, paint, a rust remover, a welding tool, and insulation materials to name a few. Ensure you have all the necessary items before starting the restoration process.
It is important to note that the specific tools and materials required for restoring an antique ice cream freezer may vary depending on the condition of the freezer and the extent of the restoration needed. For example, if the freezer has significant rust damage, you may need to invest in a more heavy-duty rust remover or consider replacing certain parts. Additionally, if the insulation in the freezer is damaged or missing, you will need to purchase new insulation materials to ensure the freezer functions properly. It is always a good idea to thoroughly assess the condition of the freezer before beginning the restoration process to ensure you have all the necessary tools and materials.
Cleaning the exterior and interior of an antique ice cream freezer
The first step to restoring your vintage ice cream freezer is cleaning both the interior and exterior. Use a mild detergent and warm water to clean the freezer. If there are any stubborn stains or dirt, use a fine-bristled brush to scrub them off gently. Once done, rinse with clean water.
It is important to note that when cleaning the interior of the freezer, you should avoid using any harsh chemicals or abrasive materials that could damage the surface. Additionally, make sure to dry the interior thoroughly before storing any food items in it. For the exterior, you can use a metal polish to restore its shine and remove any rust or discoloration. However, be careful not to over-polish as this can also damage the surface. With proper cleaning and maintenance, your antique ice cream freezer can be a beautiful and functional addition to your home.
Removing rust from an antique ice cream freezer
Due to wear and tear over time, your antique ice cream freezer may have rust on its metal parts. You can remove the rust using sandpaper or a rust remover. For mild rust, sandpaper works well, but for stubborn rust, use a rust remover. Once the rust is removed, clean the freezer again before moving to the next step.
It is important to note that when using a rust remover, you should wear protective gloves and work in a well-ventilated area. Some rust removers contain harsh chemicals that can be harmful if inhaled or come into contact with your skin. Additionally, after using a rust remover, make sure to thoroughly rinse the metal parts with water and dry them completely before using the freezer again.
Repairing dents and scratches in an antique ice cream freezer
Dents and scratches are a common issue with antique ice cream freezers. To repair them, use a welding tool to fix the dents. If the scratch is deep, consider using a filler material to smooth it out. Once done, sand the surface of the freezer again, and clean before painting or refinishing.
It is important to note that before attempting any repairs on an antique ice cream freezer, it is recommended to consult with a professional. They can provide guidance on the best approach to take, and ensure that the repair process does not damage the integrity of the freezer.
Additionally, it is important to use the correct type of paint or finish when refinishing an antique ice cream freezer. Using the wrong type of paint or finish can cause damage to the freezer, and may even affect the quality of the ice cream stored inside. It is recommended to use a food-safe paint or finish that is specifically designed for use on appliances.
Painting or refinishing an antique ice cream freezer
After repairing any significant issues with your antique ice cream freezer, the next step is to give it a fresh coat of paint or refinishing. Choose a paint or finishing type based on your preferences and the look you want to achieve. Apply the paint or finishing in light coats to achieve a smooth finish with no drips.
It is important to note that when painting or refinishing an antique ice cream freezer, you should use a paint or finishing that is safe for food contact. Look for paints or finishes that are labeled as food-safe or non-toxic. Additionally, consider using a clear coat or sealant to protect the paint or finish from chipping or peeling over time. Allow the paint or finish to fully dry and cure before using the freezer to ensure that it is safe for storing food.
Replacing missing or broken parts in an antique ice cream freezer
If your antique ice cream freezer is missing pieces or has broken parts, it’s essential to find replacements. Look for original parts or replicas to replace the missing or broken ones. If you can’t find them, consider having them custom-made or get creative and use items that can be repurposed such as knobs from an old stove.
It’s important to note that when replacing parts in an antique ice cream freezer, you should be careful not to damage any original components. If you’re unsure about how to replace a part, consult with a professional or someone with experience in antique restoration. Additionally, it’s a good idea to keep a record of any replacements or repairs made to the freezer, as this can affect its value and authenticity as an antique.
Wiring and electrical considerations when restoring an antique ice cream freezer
When restoring an antique ice cream freezer, you may need to rewire it, especially if it’s one of the older models. Ensure you have the necessary electrical knowledge to rewire it safely and correctly for it to function well.
Before rewiring the antique ice cream freezer, it’s important to inspect the wiring and electrical components thoroughly. Look for any signs of damage, such as frayed wires or corroded connections. If you notice any issues, it’s best to replace the damaged parts before rewiring the freezer.
Additionally, when rewiring the antique ice cream freezer, it’s important to use the correct gauge of wire and appropriate connectors. Using the wrong wire gauge or connectors can lead to electrical problems or even a fire hazard. It’s also important to follow any manufacturer’s instructions or wiring diagrams to ensure the wiring is done correctly.
Insulating an antique ice cream freezer for efficient cooking
Insulating your antique ice cream freezer is crucial if you want to use it for cooking, especially if you plan to make ice cream for commercial purposes. Insulation helps in maintaining uniform temperatures, preventing temperature fluctuations that can affect ice cream quality. You can use spray foam insulation, fiberglass insulation, or cellulose insulation to insulate your antique ice cream freezer.
When insulating your antique ice cream freezer, it is important to consider the type of insulation material you use. Spray foam insulation is a popular choice because it can easily fill in gaps and crevices, providing a tight seal. Fiberglass insulation is also effective, but it requires more effort to install and may not be as durable as spray foam. Cellulose insulation is an eco-friendly option, made from recycled materials, but it may not be as effective in extreme temperatures. Ultimately, the type of insulation you choose will depend on your specific needs and preferences.
Testing the restored antique ice cream freezer
Before using your restored antique ice cream freezer, it’s crucial to test it to ensure it works well. Turn it on and allow it to run for a few hours to test its efficiency. Adjust the temperature settings if they need to be adjusted until you achieve the desired results.
Caring for your restored antique ice cream freezer
After restoring your antique ice cream freezer, it’s essential to care for it well. Regularly clean it using a mild detergent and warm water to prevent dirt and dust buildup. Store it in a dry room away from direct sunlight or moisture. Additionally, ensure it’s functioning correctly by testing it regularly.
Cooking with a restored antique ice cream freezer: Tips and tricks
To get the best results when cooking with your restored antique ice cream freezer, ensure you use quality ingredients and follow the recipes well. Additionally, ensure the temperature settings are correct and consistent throughout the cooking process. Remember, patience and attention to detail are essential when using antique ice cream freezers for cooking.
Frequently asked questions about restoring an antique ice cream freezer for cooking
Q: Can I use any paint type for my antique ice cream freezer?
A: No, it’s crucial to use paint types designed for metal surfaces.
Q: How can I get an original part for my antique ice cream freezer?
A: You can look for them online or consult an expert for guidance.
Q: Do I need to insulate my antique ice cream freezer?
A: Yes, insulation helps in uniform temperature control, which is crucial when cooking with antique ice cream freezers.
Q: How often should I test my restored antique ice cream freezer?
A: It’s crucial to test it regularly to ensure it’s functioning correctly. However, how regularly you test it depends on how often you use it.
Conclusion:
Restoring an antique ice cream freezer for cooking can be a challenging but rewarding task. With the right tools, materials, and time, you can complete the restoration process and enjoy the unique experience of cooking with your vintage ice cream freezer. Always remember to exercise caution and seek expert guidance if unsure about any part of the restoration process to avoid causing damage to the antique piece.