If you’re a fan of homemade ice cream, you may have come across antique ice cream makers at flea markets or garage sales. These charming machines, from hand-cranked models to electric motors, were once the centerpiece of family gatherings and summer parties. But if your antique ice cream maker has seen better days, you might wonder if it’s worth it to restore it for cooking.
Why restore an antique ice cream maker for cooking?
There are several reasons to restore an antique ice cream maker for cooking. First, vintage models can add a touch of nostalgia and charm to your kitchen, both as a functional machine and as a decorative piece. Second, antique ice cream makers offer a unique way to make and serve homemade ice cream, with a range of features and styles that are hard to find in modern models. And third, restoring an antique ice cream maker can provide a fun and rewarding DIY project for those interested in history and craftsmanship.
The history of antique ice cream makers
Antique ice cream makers have a rich history dating back to the early 19th century. The first recorded patent for an ice cream maker was filed in 1843 by Nancy Johnson of Philadelphia, who invented a hand-cranked machine that could produce up to six quarts of ice cream in 20-30 minutes. Over the years, manufacturers such as White Mountain, Arctic, and Sterling introduced new designs and features, from wooden tubs and metal paddles to electric motors and automatic timers. By the 1950s, home ice cream makers had become a popular staple of American households.
Types of antique ice cream makers and their features
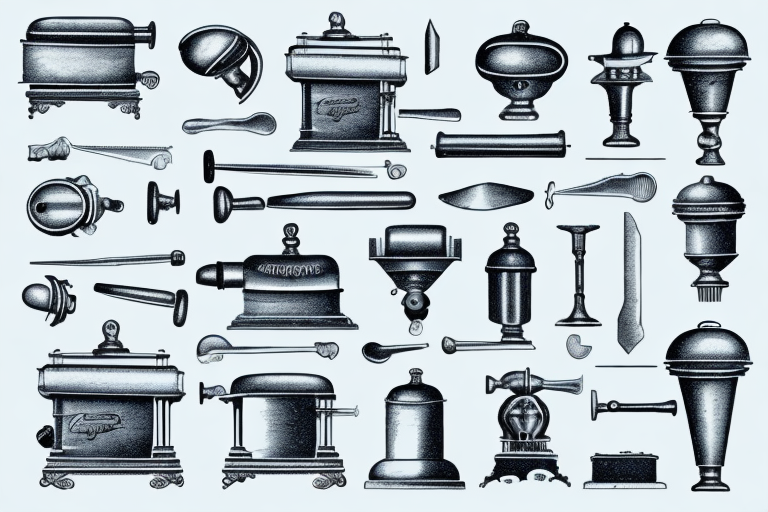
Antique ice cream makers can be classified into several types, depending on their size, shape, and mechanism. The most common types are:- Hand-cranked churns: these models feature a wooden or metal tub, a dasher or paddle that turns the cream mixture, and a crank or handle that rotates the paddle. Hand-cranked churns are usually made of wood or metal, with capacities ranging from 1 quart to 12 quarts.- Electric churns: these models have an electric motor that powers the dasher or paddle, eliminating the need for manual cranking. Electric churns may also have additional features, such as a freezer bowl or a built-in refrigeration system.- Freezer canisters: these models consist of a metal or plastic canister that is placed inside a larger container filled with ice and salt. The cream mixture is poured into the canister, which is then stirred by hand or a motorized device until frozen.Each type of ice cream maker has its advantages and drawbacks, depending on personal preference and cooking needs. Hand-cranked churns offer a traditional and hands-on experience, while electric and freezer canisters provide a more convenient and efficient way to make ice cream.
Choosing the right antique ice cream maker to restore
Before embarking on a restoration project, it’s important to choose the right antique ice cream maker for your needs and budget. Here are some factors to consider:- Type and size: as discussed above, antique ice cream makers come in different types and sizes. Think about how much ice cream you want to make, how often you will use the machine, and whether you prefer a manual or electric model.- Condition: examine the ice cream maker for signs of wear and damage, such as rust, cracks, missing parts, or non-functioning components. Look for machines that are structurally sound and have all the major parts intact.- Authenticity and rarity: some antique ice cream makers may be more valuable or collectible than others, depending on their brand, design, or history. If you’re interested in collecting or displaying antique ice cream makers, consider the authenticity and rarity of the machine.
Tools and materials needed for restoration
Restoring an antique ice cream maker requires some basic tools and materials, including:- Screwdrivers, pliers, and wrenches for disassembling and reassembling the machine- Sandpaper, wire brushes, and steel wool for removing rust, dirt, and paint- Wood glue, clamps, and screws for repairing or replacing wooden parts- Metal paint, spray lacquer, and oil or wax for refinishing and protecting metal parts- Replacement parts such as gears, paddles, cranks, and lids (if necessary)
Step-by-step guide to restoring an antique ice cream maker for cooking
Restoring an antique ice cream maker can be a time-consuming and challenging task, but the following steps can help guide you through the process:1. Disassemble the ice cream maker: remove all the parts from the machine, including the tub, dasher, crank, and any other components.2. Clean and sanitize the machine: use a mixture of warm water and soap to clean the metal and wooden parts, removing any dirt, rust, or debris. Rinse the parts thoroughly and sanitize them with a solution of bleach and water to kill any bacteria or germs.3. Repair or replace wooden parts: if the wooden tub or crank is damaged or worn out, use wood glue to reattach any loose or split pieces, and reinforce them with screws or clamps. If the wooden tub needs to be replaced, measure the dimensions and buy a new tub from a woodworking supply store.4. Refinish the metal parts: use sandpaper, wire brushes, or steel wool to remove any rust or peeling paint from the metal parts, such as the lid, crank, or gears. Apply a coat of metal paint or spray lacquer to protect the metal from further damage.5. Lubricate and reassemble the machine: use a food-grade lubricant such as vegetable oil or beeswax to lubricate the gears, paddles, and other moving parts. Reassemble the machine, following the manufacturer’s instructions or a restoration guide.6. Test the machine: add the ice cream mixture to the tub, and turn the crank or motor to churn the cream. Check the consistency and texture of the ice cream, adjusting the speed or time if necessary.
Cleaning and sanitizing an antique ice cream maker
To maintain the hygiene and safety of your restored antique ice cream maker, it’s important to clean and sanitize it after each use. Here are some tips for cleaning and sanitizing an antique ice cream maker:- Remove all the parts from the machine and wash them with warm water and soap.- Rinse the parts thoroughly and sanitize them with a solution of bleach and water (1 tablespoon of bleach per gallon of water), or a commercial sanitizer such as Star San or One Step.- Let the parts air dry, or wipe them dry with a clean cloth.- Store the parts in a clean and dry place, avoiding direct sunlight or moisture.
Replacing broken or missing parts in an antique ice cream maker
If your antique ice cream maker has broken or missing parts that can’t be repaired, you may need to find replacement parts. Here are some tips for replacing broken or missing parts in an antique ice cream maker:- Identify the brand and model of the machine, if possible. Look for the serial number or any markings on the parts or the instruction manual.- Search online for replacement parts from antique ice cream maker websites, eBay, Etsy, or other specialty shops.- Contact antique ice cream maker collectors or community forums for advice and resources.- Consider buying a donor machine or salvaging parts from other antique ice cream makers.
How to repaint an antique ice cream maker
Repainting an antique ice cream maker can give it a fresh look and protect it from rust and wear. Here are some steps for repainting an antique ice cream maker:1. Disassemble the machine: remove all the parts that need to be painted, such as the tub, crank, and gears.2. Clean and sand the parts: use sandpaper or a wire brush to remove any rust or loose paint from the metal parts. If the wooden parts need to be painted, sand them lightly to create a rough surface for better adhesion.3. Apply primer: use a metal primer or wood primer to create a base for the paint. Apply the primer evenly to the parts, using a brush or spray can.4. Apply paint: choose a high-quality paint that is safe for food contact and durable. Apply the paint to the parts, using a brush or spray can. Let the paint dry completely between coats, and apply as many coats as necessary to achieve the desired color and finish.5. Apply clear coat (optional): if you want to add extra protection and shine to the painted parts, apply a clear coat of lacquer or polyurethane. Let the clear coat dry completely before reassembling the machine.
Lubricating and testing the restored antique ice cream maker
After restoring your antique ice cream maker, it’s important to lubricate the moving parts and test the machine before using it for cooking. Here are some tips for lubricating and testing the restored antique ice cream maker:- Use a food-grade lubricant such as vegetable oil or beeswax to lubricate the gears, paddles, and other moving parts. Apply the lubricant sparingly, avoiding excess buildup or dripping.- Turn the crank or motor to test the machine, without adding any cream mixture. Check that the parts are moving smoothly and evenly, and listen for any unusual noises or vibrations.- Add the ice cream mixture to the tub, and turn the crank or motor to churn the cream. Check the consistency and texture of the ice cream, adjusting the speed or time if necessary.
Tips for using a restored antique ice cream maker for cooking
Using a restored antique ice cream maker for cooking can be a fun and rewarding experience. Here are some tips for using a restored antique ice cream maker for cooking:- Choose a high-quality ice cream recipe that suits your taste and dietary needs, such as a classic vanilla, a fruity sorbet, or a vegan alternative.- Follow the recipe instructions carefully, including the amounts of cream, sugar, eggs, and flavorings.- Let the ice cream mixture chill in the fridge for a few hours or overnight, until it reaches a temperature of 40°F or lower.- Set up the ice cream maker according to the manufacturer’s instructions or the restoration guide, and pour the cream mixture into the tub.- Crank or churn the cream for the recommended time, depending on the type of machine and the recipe. Check the consistency and temperature of the ice cream, and let it freeze for a few hours or overnight before serving.
Delicious recipes to try with your restored antique ice cream maker
Here are some delicious and easy-to-make recipes to try with your restored antique ice cream maker:- Classic Vanilla Ice Cream: combine 2 cups of heavy cream, 1 cup of whole milk, ¾ cup of sugar, and 1 teaspoon of vanilla extract in a mixing bowl. Whisk until the sugar dissolves, and chill in the fridge for at least 2 hours. Pour the mixture into the ice cream maker, and churn until thick and creamy.- Strawberry Sorbet: puree 3 cups of fresh strawberries in a blender, and strain through a fine-mesh sieve to remove the seeds. Combine the strawberry puree with ¾ cup of sugar, 1 tablespoon of lemon juice, and 1 tablespoon of vodka (optional). Chill the mixture in the fridge for at least 2 hours. Pour the mixture into the ice cream maker, and churn until smooth and frozen.- Chocolate Coconut Milk Ice Cream (vegan): combine 2 cans of full-fat coconut milk, ¾ cup of sugar, ½ cup of cocoa powder, and 1 teaspoon of vanilla extract in a mixing bowl. Whisk until the sugar and cocoa powder dissolve, and chill in the fridge for at least 2 hours. Pour the mixture into the ice cream maker, and churn until rich and creamy.
Maintenance and care for your restored antique ice cream maker
To keep your restored antique ice cream maker in good condition, here are some tips for maintenance and care:- Clean and sanitize the machine thoroughly after each use, as described earlier.- Store the machine in a dry and cool place, avoiding exposure to sunlight or moisture.- Check the machine regularly for signs of wear, damage, or rust, and address any issues promptly.- Lubricate the moving parts with food-grade lubricant periodically, or after several uses.- Use the machine gently and carefully, avoiding rough handling or excessive force.- Display the machine proudly and tastefully, either as a functional kitchen gadget or a decorative collectible.
Displaying your restored antique ice cream maker as a collectible piece
If you’re not planning to use your restored antique ice cream maker for cooking, you can still enjoy it as a collectible piece of nostalgia and history. Here are some tips for displaying your restored antique ice cream maker as a collectible piece:- Choose a suitable location for the machine, such as a kitchen counter, a shelf, a table, or a display case.- Clean and polish the machine regularly, using a soft cloth and a gentle cleaner or polish.- Arrange the machine with other antique kitchen gadgets or memorabilia, such as vintage cookbooks, utensils, or posters.- Showcase the machine’s unique features or design, such as the brand logo, the metal or wooden components, or the crank or motor.- Share the story and history of the machine with your family, friends, or guests, and let them admire its beauty and charm.