If you’re a fan of vintage appliances and enjoy cooking, an old-fashioned electric can opener might be just the thing you’re missing in your kitchen. Not only do these appliances bring a touch of nostalgia and charm, they’re also sturdy and built to last, unlike some of the flimsy, modern can openers out there. But what if your old-fashioned electric can opener has seen better days? Don’t worry, restoring it to working order is easier than you might think. In this article, we’ll guide you through the process step-by-step, from understanding the benefits of using an old-fashioned electric can opener to rewiring it safely, and everything in between.
Why restore an old-fashioned electric can opener?
There are a few reasons why restoring an old-fashioned electric can opener might be worth your time. Firstly, these appliances were built to last, and with proper care and maintenance, they can serve you for decades. Secondly, they add a charming touch to your kitchen decor and can become a conversation piece when entertaining guests. Lastly, using an old-fashioned electric can opener can be a more satisfying and tactile experience than using a modern, electric or manual can opener.
Additionally, restoring an old-fashioned electric can opener can be a fun and rewarding DIY project. It allows you to learn about the inner workings of the appliance and develop new skills in repairing and restoring vintage items. It can also give you a sense of accomplishment and pride in bringing new life to an old, neglected appliance.
The benefits of using an old-fashioned electric can opener
Old-fashioned electric can openers have a few benefits over modern ones. Firstly, they’re typically sturdier and built to last, meaning you don’t have to replace them every few years. Secondly, they often have more features than modern models, such as a knife sharpener, bottle opener, and even a corkscrew. Lastly, they have a charming vintage aesthetic that can add character to any kitchen.
Another benefit of using an old-fashioned electric can opener is that they are often easier to use for people with arthritis or other hand mobility issues. The larger, more ergonomic handles and simpler design can make it easier to grip and turn the can opener, reducing strain on the hands and wrists. Additionally, the slower, more deliberate pace of an old-fashioned can opener can be helpful for those who need to take their time when opening cans.
The history of electric can openers and their evolution
The first electric can opener was invented in 1931 by the American inventor, Charles Arthur Bunker. Bunker’s design was manually operated, but it laid the groundwork for the electric can openers we know and love today. Over the years, electric can openers have evolved to be more efficient, faster, and safer to use. Nowadays, you can find electric can openers with a wide range of features and designs to suit your needs and preferences.
One of the most notable advancements in electric can opener technology is the introduction of automatic shut-off features. This feature ensures that the can opener stops working once the can is fully opened, preventing any accidents or injuries. Additionally, some electric can openers now come with built-in knife sharpeners, making them a versatile kitchen tool. With the rise of smart home technology, there are even electric can openers that can be controlled through a smartphone app or voice commands. As technology continues to advance, it will be interesting to see what new features and designs will be introduced to the electric can opener market.
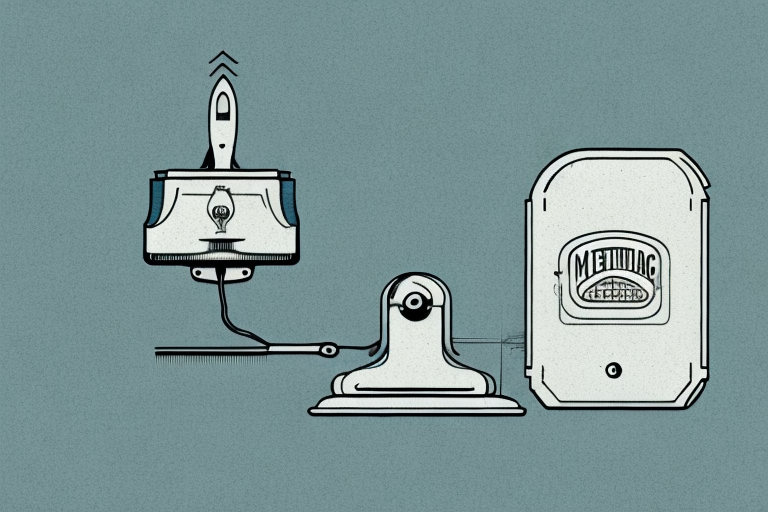
Understanding the parts of an electric can opener and their functions
Before you can restore an old-fashioned electric can opener, it’s important to understand its parts and how they function. Here are the main parts of an electric can opener:
- The blade: The blade is the part that punctures the can lid and cuts it open.
- The gear: The gear is what makes the blade move and cut through the can lid.
- The motor: The motor powers the gear and blade.
- The power cord: The power cord connects the electric can opener to a power source.
- The base: The base is what holds the electric can opener in place on your kitchen counter.
Understanding how these parts work together is crucial to restoring your electric can opener properly.
How to troubleshoot common problems with an old-fashioned electric can opener
If your old-fashioned electric can opener isn’t working properly, there are a few common issues you can troubleshoot before attempting any repairs. Firstly, make sure it’s plugged in properly and turned on. Secondly, check the blade and gear for any blockages or debris that might be preventing them from functioning properly. If these simple solutions don’t work, you might need to take the electric can opener apart and check the motor or wiring.
How to clean and maintain your old-fashioned electric can opener for optimal performance
Regular cleaning and maintenance will ensure that your old-fashioned electric can opener performs at its best. Here are a few tips for keeping your electric can opener clean and well-maintained:
- Wipe down the exterior with a damp cloth after each use.
- Clean the blade and gear by wiping them down with a dry cloth or brush.
- Oil the gears and moving parts of the electric can opener to prevent rust and ensure smooth operation.
- Tighten any loose screws or parts that might be causing the electric can opener to malfunction.
By following these tips, you can keep your old-fashioned electric can opener in top shape for years to come.
Tips for restoring an old-fashioned electric can opener to its former glory
Restoring an old-fashioned electric can opener requires some patience and attention to detail, but it’s worth it in the end. Here are a few tips for restoring your electric can opener to its former glory:
- Take pictures as you disassemble the electric can opener, so you know how to put it back together.
- Clean and polish the exterior of the electric can opener with a gentle abrasive cleaner and a soft cloth.
- Replace any worn-out parts, such as the power cord or blade.
- Oil any moving parts to ensure smooth operation.
- Test the electric can opener thoroughly before using it to ensure it’s working properly.
Following these tips will help you restore your electric can opener to its former glory and ensure it serves you for years to come.
The tools you’ll need for restoring your old-fashioned electric can opener
Restoring an old-fashioned electric can opener requires some basic tools, such as:
- Screwdriver
- Clamp
- Brush
- Oil
- New parts (if necessary)
Make sure you have these tools on hand before attempting any repairs or restoration work.
Step-by-step guide for restoring an old-fashioned electric can opener
Here’s a step-by-step guide for restoring your old-fashioned electric can opener:
- Unplug the electric can opener and remove any can lids that might be stuck on the blade.
- Remove any screws or parts that are holding the electric can opener together using a screwdriver.
- Take pictures of the electric can opener as you disassemble it, so you know how to put it back together.
- Use a soft brush or cloth to clean any debris or dust from the gears, blade, and motor.
- Inspect the motor and wiring for any damage or wear and tear. Replace any faulty parts as needed.
- Clean the exterior of the electric can opener using a gentle abrasive cleaner and a soft cloth.
- Oil any moving parts to ensure smooth operation and prevent rust.
- Reassemble the electric can opener using the pictures you took as a guide and tighten any loose screws or parts.
- Test the electric can opener thoroughly before using it to ensure it’s working properly.
Following these steps will help you restore your old-fashioned electric can opener to working condition.
How to remove rust from your old-fashioned electric can opener
If you’ve owned your old-fashioned electric can opener for a while, it’s possible that rust has developed on some of its parts. Here’s how you can remove rust from your electric can opener:
- Remove any loose rust with a wire brush or steel wool.
- Dissolve the remaining rust by soaking the affected parts in a solution of equal parts vinegar and water for a few hours.
- Rinse the parts with water and dry them thoroughly.
- Oil the parts to protect them from future rusting.
Removing rust will not only improve the appearance of your electric can opener but also ensure it continues to function properly.
How to replace worn out parts in your old-fashioned electric can opener
If your old-fashioned electric can opener has worn out parts, it’s important to replace them to ensure it continues to function properly. Here’s how you can replace worn-out parts:
- Remove the old parts by unscrewing them or pulling them off.
- Buy replacement parts that match the make and model of your electric can opener.
- Install the new parts by screwing them on or pushing them onto their respective connectors.
- Tighten any screws to ensure the new parts sit firmly in place.
- Test the electric can opener to ensure the new parts are working properly.
Replacing worn-out parts will extend the lifespan of your old-fashioned electric can opener and keep it working for years to come.
How to rewire your old-fashioned electric can opener safely
If the wiring in your old-fashioned electric can opener is damaged or frayed, it’s important to rewire it safely before using it again. Here’s how you can rewire your electric can opener:
- Unplug the electric can opener and remove any screws or parts that are holding it together.
- Take pictures of the electric can opener as you disassemble it, so you know how to put it back together.
- Remove the damaged or frayed wiring carefully, making sure to note the color and position of each wire.
- Cut a length of new wiring that’s the same gauge and length as the old wiring.
- Strip the ends of the new wiring and attach them to their corresponding connectors using wire nuts or connectors.
- Tighten any screws or parts and replace any covers that were removed.
- Test the electric can opener thoroughly before using it to ensure it’s working properly.
Rewiring your electric can opener can be dangerous, so it’s important to take your time and follow these steps carefully.
Safety tips when working with electricity and appliances
Working with electricity and appliances can be dangerous, so it’s important to take a few safety precautions:
- Always unplug the appliance before working on it.
- Use caution when handling sharp tools and blades.
- Wear gloves and eye protection to prevent injury.
- Follow the manufacturer’s instructions when disassembling and repairing the appliance.
- When in doubt, consult a professional electrician or repair person.
Conclusion: Enjoying the benefits of a restored, vintage electric can opener
Restoring an old-fashioned electric can opener can be a fun and rewarding project that pays off in the long run. By following the steps and tips outlined in this article, you can restore your electric can opener to working order and enjoy the benefits of a charming, vintage appliance. Remember to take your time, stay safe, and enjoy the satisfaction of a job well done.