Old-fashioned toasters may not be as widely used as modern toasters, but they have a charm and nostalgia that is hard to resist. If you’ve come across an old-fashioned toaster that you’d like to use in your cooking, you may need to restore it first. In this article, we’ll take you through the process of restoring an old-fashioned toaster step-by-step.
Why restore an old-fashioned toaster?
There are many reasons why you may want to restore an old-fashioned toaster. Perhaps it’s a family heirloom that you want to use in your kitchen, or maybe you prefer the design of the old-fashioned toaster over modern ones. Additionally, old-fashioned toasters have a unique mechanism that makes them perfect for cooking certain foods like grilled cheese sandwiches, waffles, and paninis.
Another reason to restore an old-fashioned toaster is that they are often made with higher quality materials and craftsmanship than modern toasters. This means that they can last for decades with proper care and maintenance, whereas modern toasters may need to be replaced every few years. Restoring an old-fashioned toaster can also be a fun and rewarding DIY project, allowing you to learn about the inner workings of the appliance and develop new skills.
Finally, restoring an old-fashioned toaster can be a more sustainable choice than buying a new one. By giving new life to an old appliance, you are reducing waste and minimizing your environmental impact. You can also feel good knowing that you are preserving a piece of history and keeping a unique and valuable item out of the landfill.
Understanding the anatomy of an old-fashioned toaster
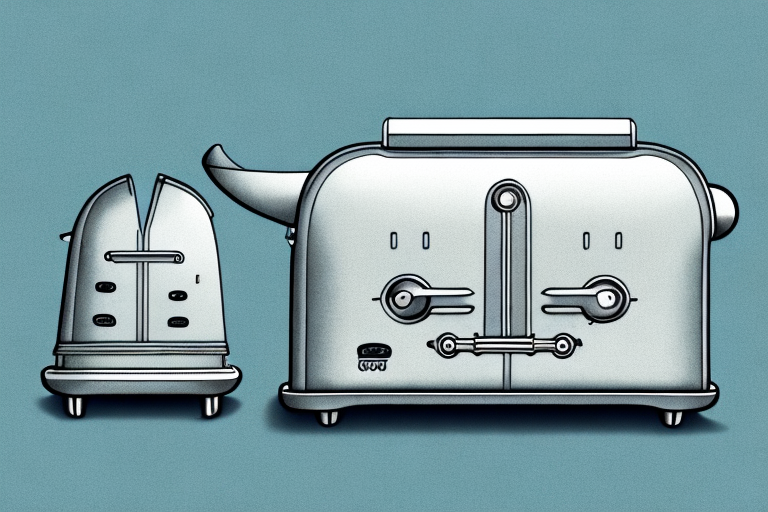
Before you start restoring your old-fashioned toaster, it’s essential to understand its anatomy. Most old-fashioned toasters have four parts: the housing, the lever, the crumb tray, and the elements. The housing is the outer shell of the toaster, while the lever is used to lower the bread into the toaster. The crumb tray is located at the bottom of the toaster and is used to collect crumbs, and the elements are the heating coils that toast the bread.
It’s important to note that the elements in an old-fashioned toaster can become brittle and break over time, which can affect the toaster’s ability to toast bread evenly. If you notice that your toaster is not toasting bread as well as it used to, it may be time to replace the elements. You can purchase replacement elements online or at a hardware store, but be sure to consult the toaster’s manual or a professional before attempting to replace them yourself.
Tools and materials required for restoring an old-fashioned toaster
You’ll need several tools and materials to restore your old-fashioned toaster, including a screwdriver, pliers, a wire brush, sandpaper, a metal polish, and a lubricant. You may also need replacement parts like new heating elements, a new cord, or new knobs.
Before beginning the restoration process, it’s important to ensure that the toaster is unplugged and cool to the touch. Additionally, you may want to wear gloves to protect your hands from any sharp edges or debris. It’s also a good idea to have a clean workspace with plenty of ventilation to avoid inhaling any dust or fumes from the restoration process.
Step-by-step guide to disassemble the old-fashioned toaster
The first step in restoring an old-fashioned toaster is to disassemble it. To do this, start by unplugging the toaster and removing the crumb tray. Use a screwdriver to remove any screws holding the toaster housing in place. Once the housing is removed, you’ll have access to the heating elements and the lever mechanism.
Next, carefully remove the heating elements by unscrewing them from the toaster. Be sure to keep track of which screws go where, as some may be different sizes or lengths. Once the heating elements are removed, you can clean them with a soft cloth and some mild soap and water.
After cleaning the heating elements, it’s time to move on to the lever mechanism. This is the part of the toaster that lowers and raises the bread. Use a pair of pliers to carefully remove any pins or clips holding the lever mechanism in place. Once the mechanism is removed, you can clean it with a soft cloth and some mild soap and water.
Cleaning and polishing the toaster’s exterior and interior
With the toaster disassembled, the next step is to clean and polish its exterior and interior. Use a wire brush or sandpaper to remove any rust or debris from the housing and heating elements. Then, use a metal polish to shine the surface of the toaster. For the interior, wipe down the heating elements with a damp cloth to remove any debris or crumbs.
It is important to note that before cleaning the toaster, it should be unplugged and allowed to cool down completely. This will prevent any accidents or injuries from occurring. Additionally, if the toaster has any removable parts, such as crumb trays, they should be washed separately with warm soapy water and dried thoroughly before reassembling the toaster.
Regular cleaning and maintenance of your toaster will not only keep it looking shiny and new, but it will also help to prolong its lifespan. It is recommended to clean your toaster at least once a month, or more frequently if you use it frequently. By following these simple steps, you can ensure that your toaster is always in top condition and ready to make your favorite breakfast treats.
How to replace damaged or missing parts of the toaster
While cleaning and polishing the toaster, you may discover that some parts are damaged or missing. To restore the toaster’s functionality, you’ll need to replace these parts. Common replacement parts include heating elements, cords, knobs, and levers. Make sure to get replacement parts that are compatible with your specific toaster model.
Before attempting to replace any parts, make sure to unplug the toaster and let it cool down completely. This will prevent any potential electrical hazards or burns. It’s also important to refer to the toaster’s manual or manufacturer’s website for specific instructions on how to replace the damaged or missing parts. If you’re unsure about how to proceed, it’s best to seek the help of a professional or contact the manufacturer for assistance.
Lubricating the moving parts of the toaster
After cleaning and replacing any damaged parts, the next step is to lubricate the moving parts of the toaster. Lubrication helps the toaster function smoothly and prevents wear and tear. Use a lubricant like WD-40 or graphite powder to lubricate the lever mechanism.
It is important to note that not all parts of the toaster require lubrication. Avoid lubricating the heating elements or any electrical components, as this can cause damage or even a fire hazard. Only lubricate the parts that are specifically designed to move, such as the lever mechanism and the crumb tray.
Additionally, it is recommended to lubricate the toaster every six months to ensure optimal performance. Over time, the lubricant can dry out or become contaminated with debris, which can cause the toaster to function poorly. Regular lubrication can extend the lifespan of your toaster and prevent the need for costly repairs or replacements.
Reassembling the restored toaster
Once all the parts of the toaster are clean, polished, and lubricated, it’s time to reassemble it. Carefully put back all the heating elements, knobs, and levers, and screw the housing back in place. Make sure all the parts fit together correctly and that the toaster is securely fastened.
It’s important to note that before plugging in the toaster, you should double-check that all the wires and connections are properly secured. Once you’ve confirmed that everything is in place, plug in the toaster and turn it on for a test run. If everything is working correctly, you can enjoy your freshly restored toaster and perfectly toasted bread!
Testing the functionality of the restored toaster
With the toaster reassembled, plug it in and test its function. Place a slice of bread in the toaster and lower the lever. Monitor the bread as it toasts to make sure everything is functioning correctly.
If the toaster does not function properly, check the wiring and connections to ensure everything is properly connected. If the issue persists, consult a professional electrician or consider replacing the toaster altogether. It’s important to ensure the safety of yourself and others when dealing with electrical appliances.
Tips for maintaining your restored old-fashioned toaster
To keep your restored old-fashioned toaster working correctly, there are a few maintenance tips to keep in mind. First, regularly clean the toaster to remove any crumbs or debris that can cause a fire hazard. Second, if you notice any damage or malfunctioning parts, replace them immediately to prevent further damage. Finally, keep your toaster dry to prevent rusting and wear and tear.
Additionally, it is important to use the correct voltage and wattage when operating your restored old-fashioned toaster. Using the wrong voltage or wattage can cause damage to the toaster and potentially start a fire. Always check the manufacturer’s instructions or consult with a professional before plugging in your toaster. By following these maintenance tips and using the correct voltage and wattage, you can ensure that your restored old-fashioned toaster will continue to work properly for years to come.
Creative ways to use your restored old-fashioned toaster in modern cooking
Now that you’ve restored your old-fashioned toaster, you may be wondering how to use it in your cooking. Old-fashioned toasters are perfect for toasting thick slices of bread, making waffles, grilling sandwiches, and even cooking bacon. Get creative with your restored toaster and use it to add a vintage touch to your cooking.
Another great way to use your restored old-fashioned toaster is to make homemade croutons. Simply cut your bread into small cubes, toss them in olive oil and your favorite seasonings, and toast them in your toaster until they are crispy and golden brown. You can also use your toaster to roast nuts, such as almonds or pecans, for a delicious and crunchy topping for salads or desserts. Don’t be afraid to experiment with your restored toaster and discover new ways to incorporate it into your modern cooking.
Frequently asked questions about restoring old toasters
Q: Can I restore any old-fashioned toaster?
A: Some old-fashioned toasters may be beyond repair or too dangerous to restore. Always assess the condition of the toaster before attempting to restore it.
Q: Can I use a restored old-fashioned toaster on an electric stove?
A: Never use an old-fashioned toaster on an electric stove. They are designed to be used with a heating element and are not compatible with electric stoves.
Q: Can I use a restored old-fashioned toaster to toast bagels?
A: Old-fashioned toasters are not designed to toast bagels. They can only accommodate thin slices of bread.
Q: Are restored old-fashioned toasters safe to use?
A: Restored old-fashioned toasters can be safe to use if they have been restored correctly. Always double-check that all parts are functioning correctly before using the toaster.
Now that you know how to restore an old-fashioned toaster, you can bring a piece of history into your kitchen. With proper care and maintenance, your restored toaster is sure to last for years to come.
Q: What are some common issues that old-fashioned toasters may have?
A: Some common issues that old-fashioned toasters may have include frayed cords, broken heating elements, and rusted or corroded parts. It is important to address these issues before attempting to restore the toaster to ensure its safety and functionality.