If you’re a true cooking enthusiast, you know that vintage kitchen equipment adds an authentic and unique touch to your cooking. One of the best vintage kitchen tools to have is a classic meat slicer. Not only does it serve as a beautiful decorative piece in your kitchen, but it also helps you achieve evenly sliced cuts of meat. However, finding a functioning vintage meat slicer can be difficult. Fortunately, restoring one can be a fun and worthwhile project for any home cook. In this article, we’ll go through the process of restoring a classic meat slicer from start to finish, including why it’s worth the effort, the different types of slicers, necessary tools and materials, and maintenance tips to keep your restored meat slicer in top condition.
Why restoring a classic meat slicer is worth the effort
Restoring a classic meat slicer is a rewarding experience that comes with many benefits. Firstly, vintage slicers are often made from durable materials such as cast iron, which makes them sturdier than modern plastic models. Secondly, they offer a unique design that complements any kitchen decor. Finally, you get the satisfaction of using a restored piece of history in your day-to-day cooking. Whether you’re a home cook or a professional chef, a restored classic meat slicer is a valuable tool for creating beautiful, even cuts of meat.
Moreover, restoring a classic meat slicer can also be a cost-effective option. While new meat slicers can be expensive, restoring a vintage model can be a more affordable alternative. Additionally, restoring a classic meat slicer can be a fun and educational project. It allows you to learn about the history and mechanics of the machine, and can be a great way to spend time with friends or family.
Understanding the different types of classic meat slicers
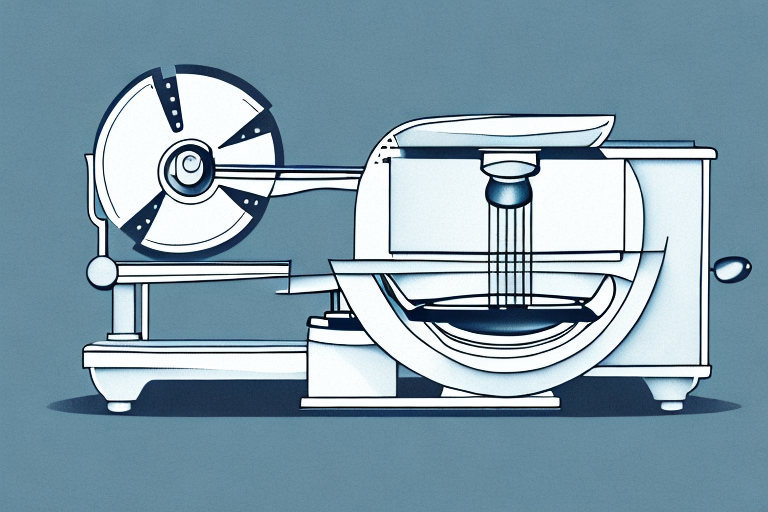
Before you start restoring, it’s important to know which type of classic meat slicer you have. There are generally two types: gravity-fed and fly-wheel slicers. Gravity-fed slicers are more common and they operate by pulling the carriage towards the blade. Fly-wheel slicers are rarer and they require manual operation by turning the flywheel. Once you know which type you have, you can start researching how to properly disassemble and restore them.
It’s also important to note that classic meat slicers come in different sizes and blade types. The size of the slicer will determine the amount of meat it can handle at once, while the blade type will affect the thickness of the slices. Some slicers have adjustable blades, allowing for more versatility in slicing different types of meats. When restoring a classic meat slicer, it’s important to ensure that the blade is sharp and in good condition, as a dull or damaged blade can affect the quality of the slices.
Necessary tools and materials for restoring a classic meat slicer
Restoring a classic meat slicer requires a few essential tools. You’ll need a set of screwdrivers, pliers, a wire brush, a lubricant, and various cleaning materials like a degreaser and metal polish. Depending on the extent of the restoration, you may also need to purchase replacement parts such as blades, belts, and bearings. Be sure to research which parts are needed for your specific slicer before starting the restoration process.
It’s important to note that restoring a classic meat slicer can be a time-consuming process. You’ll need to be patient and take your time to ensure that each part is properly cleaned and restored. It’s also recommended to wear protective gloves and eyewear while working with the slicer to avoid any injuries. Once the restoration is complete, you’ll have a beautiful and functional piece of equipment that can be used for years to come.
Step-by-step guide to disassembling a classic meat slicer
Disassembling a classic meat slicer can be a challenging and time-consuming process. It’s important to take photos or notes of the assembly process to help you remember how to reassemble it later. Start by unplugging the slicer and removing any detachable parts such as the meat grip, blade, and slicing tray. Then, remove the screws and take note of what parts you’re removing. Pay attention to the order in which you remove them as this will make it easier to put them back together later. Be sure to take care when handling sharp blades or other delicate parts.
It’s also important to clean each part thoroughly as you disassemble the meat slicer. Use a damp cloth or sponge to wipe down each piece, being careful not to get any water on the motor or electrical components. If there is any buildup or residue on the blade or other parts, use a mild detergent and warm water to clean them. Once all the parts are clean and dry, you can begin the reassembly process, following your notes or photos to ensure everything is put back in the correct order.
Cleaning and polishing tips for restoring a classic meat slicer
Once you’ve disassembled your meat slicer, it’s time to start cleaning and polishing. Use a degreaser to remove any built-up grease, dirt, or grime from the parts. A wire brush can be helpful for removing rust or other tough stains. After cleaning, use a metal polish to bring back the shine of the slicer’s various parts. Be sure to use a non-toxic polish that is safe to use around food.
When cleaning a classic meat slicer, it’s important to pay attention to the blade. The blade should be carefully cleaned and sharpened to ensure that it can effectively slice meat. A dull blade can cause the meat to tear or shred, which can affect the quality of the final product. You can use a sharpening stone or a honing rod to sharpen the blade, but be sure to follow the manufacturer’s instructions carefully.
After cleaning and polishing your meat slicer, it’s a good idea to lubricate the moving parts to ensure that they operate smoothly. You can use a food-grade lubricant to lubricate the parts, but be sure to avoid getting any lubricant on the blade or other parts that come into contact with food. Once you’ve lubricated the parts, reassemble the meat slicer and test it out to make sure that it’s working properly.
How to replace damaged or missing parts in a classic meat slicer
If you find that certain parts of your meat slicer are damaged or missing, don’t worry. Many replacement parts are available online or from specialty shops. You’ll need to identify which parts need replacing and what type of slicer you have to find the right ones. Be sure to measure any parts that need replacing to ensure they match the original specifications.
It’s important to note that replacing parts in a meat slicer can be dangerous if not done properly. Always unplug the slicer and follow the manufacturer’s instructions carefully. If you’re unsure about how to replace a certain part, it’s best to consult a professional or contact the manufacturer for guidance. Additionally, regular maintenance and cleaning can help prevent the need for part replacements in the first place.
Lubricating and reassembling your restored classic meat slicer
Once you’ve cleaned and replaced any parts, it’s time to reassemble and lubricate the slicer. Lubricate any moving parts with a food-safe lubricant to ensure they move smoothly. Then, begin reassembling the parts in reverse order of how you disassembled them. Use your notes or photos to help guide you. Finally, test the slicer to make sure it’s running smoothly and safely.
Safety precautions when using a vintage meat slicer
When using a vintage meat slicer, it’s important to take safety precautions. Always make sure the slicer is properly assembled and cleaned before use. Use a meat grip to hold the meat securely while slicing and make sure your hands are far away from the blade. Never use your hand to push meat through the slicer. Always use the slicing tray that comes with the slicer. And, of course, unplug the slicer when not in use.
Maintenance tips for keeping your restored classic meat slicer in top condition
To keep your restored classic meat slicer in top condition, it’s important to maintain it regularly. Clean it after each use with warm water and a mild detergent. Dry thoroughly before storing to prevent rust. Lubricate the moving parts periodically and replace any worn or damaged parts as needed. Store it in a dry, cool place to prevent rust or corrosion. With proper maintenance, your restored meat slicer can last for generations.
Creative ways to use a vintage meat slicer in your cooking
Finally, it’s time to put your restored classic meat slicer to use. There are many creative ways to incorporate a vintage meat slicer into your cooking. Slice your own deli meats or cheese for a custom sandwich or charcuterie board. Create beautifully thin slices of vegetables or fruits for a gourmet salad or tart. Slice hard-boiled eggs or potatoes for an elevated potato salad. The possibilities are endless!
The benefits of using a restored vintage meat slicer over modern alternatives
Using a restored vintage meat slicer over a modern alternative has many benefits. Firstly, it’s a more sustainable option as you’re repurposing and restoring an existing tool. Secondly, vintage slicers are often made from higher-quality materials and built to last longer. Finally, vintage slicers offer a unique design that complements any kitchen decor.
How to showcase your restored vintage meat slicer as a decorative piece in your kitchen
After all the hard work you put into restoring your classic meat slicer, you’ll want to show it off as a decorative piece in your kitchen. You can display it on a shelf or countertop for all to see. Alternatively, you can create a designated vintage kitchen area in your kitchen and showcase your collection of restored kitchen tools, including your meat slicer.
Top brands and models of classic meat slicers to look out for when restoring
When it comes to classic meat slicers, there are many top brands and models to look out for when restoring. Berkel, Hobart, and Globe are all well-known brands that offer high-quality slicers. Look for models that have stood the test of time and have a reputation for durability and performance. Do your research and find the model that best suits your needs and budget.
Frequently asked questions about restoring classic meat slicers
Lastly, here are some questions and answers about restoring classic meat slicers:
- How long does it take to restore a classic meat slicer? The time it takes to restore a meat slicer varies depending on the extent of the restoration needed. It can take anywhere from a few hours to a few weeks.
- How much does it cost to restore a classic meat slicer? The cost of restoring a meat slicer depends on what parts need to be replaced and the cost of those parts. Restoring a slicer can range from $50 to $500.
- Is restoring a meat slicer difficult? Restoring a meat slicer can be a challenging process, especially for those who are inexperienced with disassembling and repairing machinery. However, with patience and the right tools, it can be a rewarding project for any home cook.
Restoring a vintage meat slicer takes time, patience, and attention to detail, but the end result is a beautiful and functional piece of kitchen equipment that can last for generations. Whether you’re a home cook or a professional chef, a restored classic meat slicer is a valuable tool that is both practical and visually stunning. So, roll up your sleeves, gather your tools, and start the restoration process today!