If you own a classic rice cooker that has seen better days, and you’re thinking about throwing it out, hold on a minute. With a little bit of time and effort, you can restore it to like-new condition, and have it back up and running in no time. In this article, we’ll show you how to restore a classic rice cooker for cooking, from understanding the anatomy of a classic rice cooker to tips for maintaining the performance of your restored rice cooker. So let’s get started!
Understanding the Anatomy of a Classic Rice Cooker
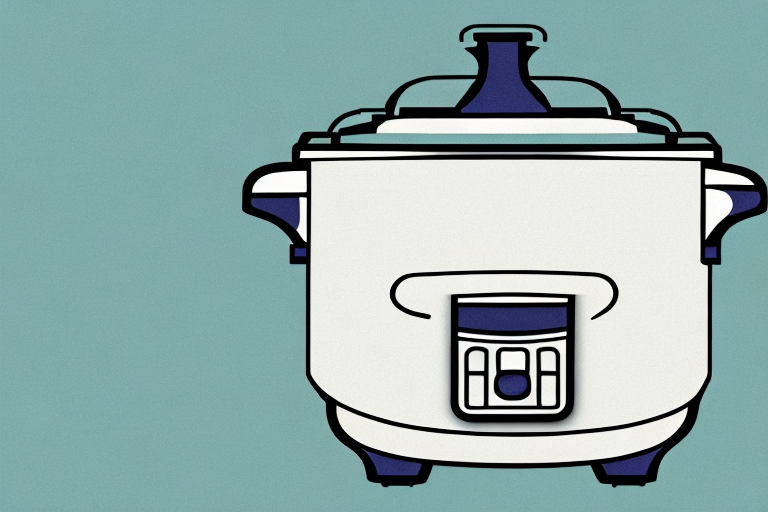
In order to restore a classic rice cooker, you first need to understand the basic components of the device. A classic rice cooker consists of three main parts: the outer cover, the inner pot, and the heating unit. The heating unit is responsible for cooking the rice, while the outer cover provides protection and insulation, and the inner pot holds the rice and water during the cooking process.
It is important to note that the heating unit in a classic rice cooker is typically made of metal, and it contains a heating element that is powered by electricity. The inner pot, on the other hand, is usually made of non-stick material, such as Teflon, to prevent the rice from sticking to the surface. Additionally, some classic rice cookers may also have a steam vent on the outer cover to release excess steam during the cooking process.
When restoring a classic rice cooker, it is essential to ensure that all three components are in good working condition. If the heating unit is damaged or malfunctioning, it may need to be replaced. Similarly, if the inner pot is scratched or damaged, it may need to be repaired or replaced to prevent the rice from sticking to the surface. By understanding the anatomy of a classic rice cooker, you can effectively restore and maintain this essential kitchen appliance for years to come.
Assessing the Condition of Your Classic Rice Cooker
Before you start any restoration work, it’s important to assess the condition of your classic rice cooker, so you know what needs to be done. Start by looking for any signs of wear and tear, such as cracks or dents in the outer cover, or rust on the heating unit. Next, check the inner pot for any scratches or damage, and make sure the heating unit is still working properly. Finally, look for any signs of buildup or corrosion inside the cooker.
Another important factor to consider when assessing the condition of your classic rice cooker is its age. Older models may have outdated technology or may not be as energy-efficient as newer models. It’s important to weigh the cost of restoration versus the cost of purchasing a new, more efficient rice cooker.
Additionally, if you plan on using your classic rice cooker for cooking other types of grains or dishes, make sure it has the necessary settings or attachments. Some older models may only be designed for cooking rice, and may not have the versatility of newer models.
The Tools You Need to Restore Your Classic Rice Cooker
Once you’ve assessed the condition of your classic rice cooker, it’s time to gather the necessary tools for restoration. You’ll need a few basic tools, including a screwdriver, pliers, a wire brush, and some cleaning solution. You may also need to purchase replacement parts, such as a new inner pot or heating element, depending on the condition of your existing parts.
Before you begin the restoration process, it’s important to do some research on your specific rice cooker model. Look for online forums or manuals that provide detailed instructions on disassembling and reassembling your rice cooker. This will help you avoid any potential mistakes or damage to your appliance. Additionally, make sure to wear protective gloves and eyewear while working with any cleaning solutions or replacement parts.
Disassembling Your Classic Rice Cooker
The next step is to disassemble your classic rice cooker. To do this, start by unplugging the device and removing the inner pot. Next, use your screwdriver to remove any screws or bolts holding the outer cover and heating unit in place. Once you’ve removed these parts, carefully set them aside for cleaning and restoration.
It’s important to note that not all classic rice cookers are the same, so it’s a good idea to take pictures or make notes as you disassemble the device. This will make it easier to reassemble the rice cooker later on. Additionally, be sure to clean all parts thoroughly before putting them back together. This will help ensure that your rice cooker works properly and lasts for years to come.
Cleaning and De-scaling the Interior of Your Classic Rice Cooker
Before you can start fixing any damaged parts, you need to clean and de-scale the interior of your classic rice cooker. To do this, mix a solution of equal parts water and white vinegar and pour it into the inner pot. Allow the solution to sit for several hours, or overnight, depending on the amount of buildup. Next, use a wire brush to scrub away any remaining debris or corrosion, and rinse the pot thoroughly with water.
It is important to note that you should never use abrasive cleaners or steel wool to clean the interior of your rice cooker, as this can scratch the surface and cause damage. Additionally, if you notice any stubborn stains or buildup that cannot be removed with the vinegar solution, you can try using a specialized de-scaling product designed specifically for rice cookers.
After cleaning and de-scaling your rice cooker, it is a good idea to run a test cycle with water to ensure that everything is working properly. Simply fill the inner pot with water, close the lid, and turn on the cooker. Once the water has boiled and the cooker has switched to the “keep warm” setting, check for any leaks or unusual noises. If everything seems to be in order, you can proceed with cooking rice as usual.
Replacing Worn or Damaged Parts in Your Classic Rice Cooker
If you’ve identified any worn or damaged parts during your assessment, now is the time to replace them. Depending on the specific parts that need to be replaced, you may need to order them from a manufacturer or buy them at a local hardware store. Be sure to follow the manufacturer’s instructions when installing any new parts, and test your device before reassembling.
It’s important to note that not all parts of a classic rice cooker are replaceable. Some models may have parts that are no longer available, or that can only be replaced by a professional technician. If you’re unsure about whether a part can be replaced, consult the manufacturer’s website or customer service line for guidance.
Additionally, if you’re replacing multiple parts or making significant repairs to your rice cooker, it may be worth considering whether it’s more cost-effective to simply purchase a new device. While classic rice cookers can be durable and long-lasting, they may not be worth repairing if the cost of replacement parts and labor exceeds the cost of a new unit.
Refurbishing the Exterior of Your Classic Rice Cooker
If the outer cover of your classic rice cooker is scratched or dented, you can refurbish it to make it look like new again. Start by sanding down any rough areas or rust spots with a fine-grit sandpaper. Next, apply a coat of paint or enamel, following the manufacturer’s instructions carefully. Allow the coating to dry thoroughly before reassembling the device.
It is important to note that before starting the refurbishing process, you should ensure that the rice cooker is unplugged and completely cool. Additionally, if the damage to the exterior is severe, it may be necessary to replace the cover altogether.
Once you have successfully refurbished the exterior of your classic rice cooker, it is important to maintain its appearance. Avoid using abrasive cleaners or scrubbers that could scratch the surface. Instead, use a soft cloth and mild soap to clean the exterior. Regularly cleaning and maintaining the exterior of your rice cooker will help to extend its lifespan and keep it looking like new for years to come.
Reassembling Your Restored Classic Rice Cooker
Once you’ve cleaned, repaired, and refurbished all the necessary parts of your classic rice cooker, it’s time to reassemble the unit. Follow the steps you used to disassemble the device, but in reverse order. Be sure to test the device before plugging it back in, to make sure everything is functioning properly.
When reassembling your classic rice cooker, it’s important to pay attention to the small details. Make sure all screws and bolts are tightened properly, and that all wires and connections are securely in place. Double-check that you have reassembled the device correctly, as any mistakes could lead to malfunction or even danger.
After reassembling your classic rice cooker, it’s a good idea to give it a final wipe down and polish. This will not only make it look shiny and new, but it will also help protect the device from future wear and tear. With proper care and maintenance, your restored classic rice cooker can continue to serve you for many years to come.
Testing and Troubleshooting Your Restored Classic Rice Cooker
After you’ve reassembled your classic rice cooker, it’s important to test it to ensure that it’s working properly. Fill the inner pot with water and rice, and turn the device on. As the rice cooks, monitor the device closely for any signs of malfunctioning, such as overheating or uneven cooking. If you notice any problems, try troubleshooting them by refering to the manufacturer’s manual.
Once you’ve confirmed that your restored classic rice cooker is working properly, it’s important to maintain it regularly to ensure its longevity. Clean the inner pot and exterior of the device after each use, and store it in a dry, cool place. Additionally, consider replacing any worn or damaged parts periodically to prevent any potential issues.
If you’re having trouble finding replacement parts or troubleshooting any issues, consider reaching out to a professional repair service. They can provide expert advice and assistance to ensure that your classic rice cooker continues to function properly for years to come.
Tips for Maintaining the Performance of Your Restored Classic Rice Cooker
Now that you’ve restored your classic rice cooker, it’s important to maintain its performance over time. Try using only high-quality rice and pure water when cooking, and avoid overfilling or underfilling the pot. When you’re not using the device, keep it clean and dry, and store it in a cool, dry location. Doing so will help extend the life and performance of your restored classic rice cooker.
Another important tip for maintaining the performance of your restored classic rice cooker is to regularly clean the inner pot and the exterior of the device. Use a soft cloth and mild detergent to clean the pot after each use, and wipe down the exterior with a damp cloth. This will prevent any buildup of dirt or grime that could affect the performance of the device.
Additionally, it’s a good idea to periodically check the power cord and plug of your restored classic rice cooker for any signs of wear or damage. If you notice any fraying or other damage, it’s important to replace the cord or plug immediately to prevent any safety hazards. By taking these simple steps, you can ensure that your restored classic rice cooker continues to perform at its best for years to come.
Recipes to Try with Your Newly-Restored Classic Rice Cooker
Now that your classic rice cooker is back up and running, why not try some new recipes to put it to good use? Try making classic dishes like fried rice, arroz con pollo, or risotto, or experiment with new flavors and ingredients. With your newly-restored classic rice cooker, the sky’s the limit!
We hope this guide has been helpful in showing you how to restore a classic rice cooker for cooking. Remember to follow each step carefully, and don’t rush the process. With a little bit of patience and effort, you can have a like-new rice cooker that will serve you well for years to come. Happy cooking!