If you’re a fan of vintage cooking tools or simply enjoy the flavor of coffee made in a percolator, restoring a vintage coffee percolator can be a fun and worthwhile project. Not only can you bring an old and potentially neglected piece back to life, but you’ll also have a beautiful and functional piece to use in your kitchen. In this article, we’ll cover everything you need to know to restore a vintage coffee percolator for cooking, from the tools and materials you’ll need to the steps to disassemble and reassemble the percolator, to tips for care and maintenance once you’ve finished your restoration.
Why choose a vintage coffee percolator for cooking?
There’s something special about using a vintage coffee percolator to make coffee. Not only are they beautiful and visually appealing, but they’re also much more satisfying to use than modern electric coffee makers. You know that every time you use it, you’re making a connection with the past and with a time when quality and craftsmanship mattered. Plus, the coffee made in a percolator is simply delicious.
But did you know that vintage coffee percolators can also be used for cooking? That’s right, these versatile kitchen tools can be used to make soups, stews, and even hot chocolate. The percolator’s design allows for even heating and consistent temperature control, making it perfect for slow-cooking recipes.
Another benefit of using a vintage coffee percolator for cooking is that it adds a unique flavor to your dishes. The metal and enamel materials used in vintage percolators can infuse your food with a subtle, smoky taste that can’t be replicated by modern appliances. So, if you’re looking to add some vintage charm and flavor to your cooking, consider using a vintage coffee percolator.
Tools and materials needed for restoring a vintage coffee percolator.
Before you get started, you’ll need to gather some tools and materials. You’ll need a set of screwdrivers, pliers, and wrenches, as well as some cleaning supplies like baking soda, vinegar, and dish soap. You may also need to purchase replacement parts, such as a new gasket or heating element, depending on the condition of your percolator.
It’s important to note that restoring a vintage coffee percolator can be a time-consuming process. You’ll need to be patient and take your time to ensure that each step is done correctly. It’s also a good idea to do some research beforehand to familiarize yourself with the specific model of percolator you’re working on, as well as any common issues or quirks that may arise during the restoration process.
Once you have all of your tools and materials gathered, you can begin the restoration process. Start by disassembling the percolator and cleaning each individual part thoroughly. Use a toothbrush or other small brush to scrub away any built-up grime or residue. If there are any particularly stubborn stains or spots, you can use a mixture of baking soda and vinegar to help remove them.
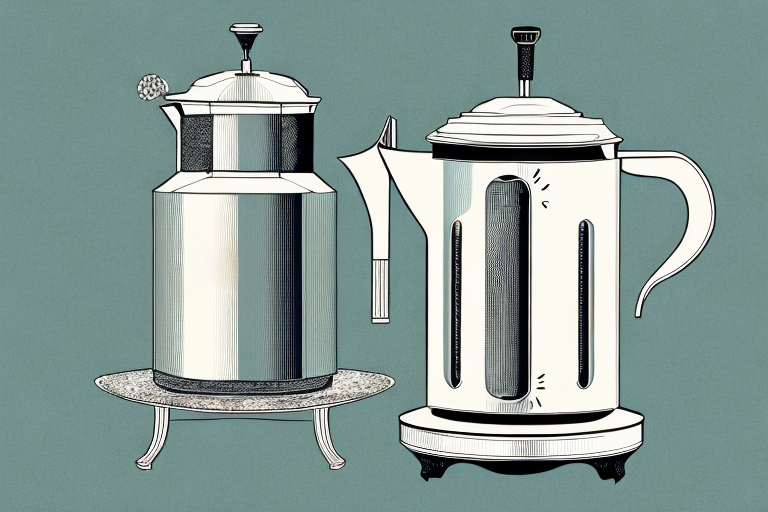
Understanding the anatomy of a vintage coffee percolator.
To start restoring your percolator, it’s helpful to understand how it works and its different parts. A vintage percolator usually consists of a main chamber where the water is heated, a coffee basket that sits on top of the chamber, and a stem that extends up from the chamber and through the coffee basket. The stem connects to a perforated top that sits on top of the basket and allows the water to percolate up through the coffee grounds. There may also be a heating element, a power cord, and a water level indicator.
It’s important to note that vintage percolators may have different designs and features depending on the manufacturer and the era in which they were produced. Some may have a glass knob on top of the lid that allows you to see the coffee as it percolates, while others may have a metal lid with a small hole for steam to escape. Additionally, some vintage percolators may have a built-in timer or automatic shut-off feature, while others may require manual monitoring to prevent over-brewing. Understanding the specific features of your vintage percolator can help you properly restore and use it for the perfect cup of coffee.
Steps to disassemble the vintage coffee percolator.
The next step is to disassemble the percolator. Start by unplugging it from the wall and removing any remaining coffee grounds from the basket and stem. Then remove any screws or bolts that are holding the percolator together. Be sure to keep track of where each part goes and take photos if needed to help you remember. If there is a heating element, disconnect it from the power source and remove it from the percolator.
Once you have removed all the screws and bolts, gently separate the percolator’s parts. Be careful not to force any parts apart, as this could damage the percolator. If any parts are stuck, try using a lubricant or gently tapping them with a rubber mallet to loosen them.
After you have disassembled the percolator, you can clean each part thoroughly. Use warm soapy water and a soft cloth to clean the parts, and be sure to dry them completely before reassembling the percolator. If any parts are damaged or worn, you may need to replace them before reassembling the percolator.
Cleaning and polishing the parts of a vintage coffee percolator.
The cleaning step is perhaps the most time-consuming part of the restoration process, but it’s also the most important. Use a solution of warm water, dish soap, and baking soda to scrub away any built-up residue, stains, or rust. You may need to let some parts soak for a while to loosen the grime. Once cleaned, polish any metal parts with a metal polish or a mixture of vinegar and salt. Rinse everything thoroughly and dry with a clean, soft cloth.
It’s important to note that not all vintage coffee percolators are created equal. Some may require additional steps or specialized cleaning products to restore them to their former glory. It’s always a good idea to research the specific make and model of your percolator before beginning the restoration process.
Additionally, after cleaning and polishing your vintage coffee percolator, it’s important to store it properly to prevent future damage. Consider wrapping any metal parts in a soft cloth or storing the percolator in a protective case to prevent scratches or dents. With proper care and maintenance, your vintage coffee percolator can continue to be a cherished piece for years to come.
Repairing or replacing damaged parts of a vintage coffee percolator.
If any parts of your percolator are damaged beyond repair, you may need to replace them. Common replacement parts include gaskets, heating elements, and percolator tops. Check online or specialty stores for replacement parts specific to your model of percolator. If the damage is minor, you may be able to repair it yourself using super glue or epoxy.
It is important to note that vintage coffee percolators may require special care and attention when repairing or replacing parts. Some older models may have unique parts that are difficult to find or may require a professional to repair. Additionally, it is important to ensure that any replacement parts are compatible with your percolator to avoid further damage or malfunction. If you are unsure about how to repair or replace a part, it is always best to consult a professional or seek guidance from a reputable source.
Tips for reassembling a vintage coffee percolator.
When it’s time to put everything back together, go slowly and double-check that each part is in the right place. You may need to refer to your photos or the manual if you have one. Tighten screws and bolts just enough to hold everything in place, but don’t overtighten. Reconnect the heating element and thread the power cord through any openings in the body of the percolator.
Testing the restored vintage coffee percolator.
Before using your restored percolator to brew coffee, you’ll want to make sure it works correctly. Fill the chamber with water and turn the percolator on. Watch for the water to heat up and percolate up through the coffee grounds. Check for any leaks or other issues as the percolator runs. If everything looks good, brew a pot of coffee to enjoy.
Maintenance and care tips for your restored vintage coffee percolator.
Once you’ve restored your percolator, some basic maintenance will help keep it functioning for years to come. Rinse out the percolator after each use and dry it thoroughly. If you have hard water, you may need to use a vinegar solution to remove any mineral buildup. Store the percolator in a dry, cool place away from sunlight and dust. If you’re not going to use it for an extended period of time, consider covering it with a cloth or bag to protect it.
Using your restored vintage coffee percolator for cooking delicious recipes.
Of course, the best part of restoring a vintage coffee percolator is using it to make coffee. But did you know that you can also use it for cooking? Recipes like soups, stews, and even steaming vegetables can be made using a percolator. Just remove the coffee basket and stem and use the percolator as a pot on your stove. Experiment with different recipes and enjoy the versatility of your restored percolator.
Frequently asked questions about restoring a vintage coffee percolator for cooking.
Q: Can any vintage coffee percolator be restored?
A: In most cases, yes. As long as the percolator is not severely damaged or missing essential components, it can be restored with some time and effort.
Q: Can I use my restored percolator on an induction stovetop?
A: It depends on the percolator. Most vintage percolators are made of aluminum or stainless steel and are not compatible with induction stovetops. However, some percolators made with specific materials may work on induction stovetops.
Q: Can I run my restored percolator for an extended period of time?
A: It’s not recommended to run a percolator for longer than is necessary to brew coffee. Running it for extended periods could cause damage to the heating element or other components.
How to find and purchase vintage coffee percolators online or in-person.
If you’re interested in restoring a vintage coffee percolator, there are a few ways you can find them. Online auction sites like eBay or Etsy can be good sources, as well as vintage or antique stores. Be sure to check the condition of the percolator and the seller’s ratings before making a purchase.
The history of the coffee percolator and its significance in cooking culture.
The coffee percolator has a long and storied history, dating back to the early 1800s. The first patent for a coffee percolator was filed in 1827 by a French inventor. Since then, percolators have become a staple of American coffee culture. They were especially popular in the mid-20th century, before the rise of electric coffee makers. Today, percolators remain popular among coffee enthusiasts and those who appreciate vintage goods.
Alternative uses for your restored vintage coffee percolator in the kitchen.
We’ve already mentioned using your restored percolator for cooking, but did you know there are other ways to incorporate it into your kitchen? Consider using it to store utensils or as a unique vase for flowers. You could also use it as a centerpiece for a vintage-themed party or wedding. Get creative and have fun with your restored percolator.
Restoring a vintage coffee percolator for cooking can be a fun and rewarding project for anyone who enjoys coffee and vintage goods. With some basic tools and materials, you can bring an old percolator back to life and enjoy its functionality and beauty for years to come.