Do you have an old-fashioned electric grill that you’ve been meaning to restore for a while now? Restoring an old electric grill can be a fun and rewarding project, but it can also be challenging if you don’t know how to begin. In this article, we’ll guide you through the process of restoring an old-fashioned electric grill so that you can enjoy cooking with it once again.
Understanding the parts of an old-fashioned electric grill
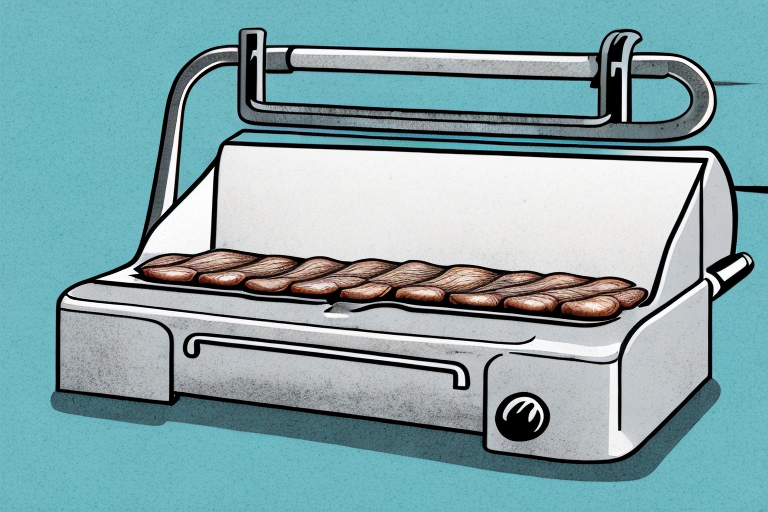
Before diving into the restoration process, it’s important to understand the different parts of an old-fashioned electric grill. This will help you determine which components need to be replaced or repaired. An old-fashioned electric grill typically consists of a cooking surface, heating elements, a thermostat control, an on/off switch, and a power cord. Some electric grills may also have a drip tray or a grease catcher.
It’s important to note that the heating elements are the most crucial part of the electric grill. They are responsible for heating up the cooking surface and cooking the food. If the heating elements are damaged or not functioning properly, the grill will not work effectively. Additionally, the thermostat control is responsible for regulating the temperature of the grill. It’s important to ensure that the thermostat control is working properly to avoid overcooking or undercooking your food.
Importance of restoring an old-fashioned electric grill
Restoring an old-fashioned electric grill not only brings new life to a cherished appliance, but it can also save you money compared to buying a new grill. Additionally, restoring a grill can prevent it from going to a landfill, which helps to reduce waste. Moreover, restored electric grills can be a prized possession and a symbol of long-lasting craftsmanship, adding character to your home and kitchen setup.
Another benefit of restoring an old-fashioned electric grill is that it allows you to customize the appliance to your liking. You can choose to repaint it in a color that matches your kitchen decor or add new features such as a built-in thermometer or a rotisserie. This level of personalization is not possible with a new grill, which often comes with a set design and features.
Furthermore, restoring an old-fashioned electric grill can be a fun and rewarding DIY project. It allows you to learn new skills such as wiring and soldering, and gives you a sense of accomplishment when you see the finished product. You can also involve your family or friends in the restoration process, making it a bonding experience and creating memories that will last a lifetime.
Safety measures to be taken while restoring an old-fashioned electric grill
Restoring an old-fashioned electric grill can be hazardous if proper safety precautions are not taken. Always wear protective gloves and eye gear when working with electrical parts. Unplug the grill from the power source before beginning any restoration work. Additionally, ensure that you work in a well-ventilated area to prevent harmful fumes from accumulating.
It is also important to inspect the wiring and electrical components of the grill before beginning any restoration work. Look for any signs of damage or wear and tear, such as frayed wires or corroded connections. If you notice any issues, it is best to have a professional electrician repair or replace the parts before continuing with the restoration process. Taking these extra precautions can help ensure that your restoration project is completed safely and successfully.
Preparing to restore an old-fashioned electric grill
Before starting the restoration work, gather all the necessary tools and equipment. You’ll need a screwdriver, pliers, a wire brush, a scraper, a heat gun, and a sandpaper. Make sure you have a clean workspace with ample space to work on the grill.
Next, carefully disassemble the grill, taking note of how each part fits together. Take pictures or make sketches if necessary to help you remember how to reassemble the grill later. Clean each part thoroughly with a degreaser and a wire brush, removing any rust or debris. If there are any damaged or broken parts, make a list of what needs to be replaced.
Once all the parts are clean and dry, you can begin the restoration process. Use the scraper and sandpaper to remove any remaining rust or paint from the metal parts. Apply a rust converter to prevent further rusting. If there are any dents or scratches, use a filler to smooth them out. Finally, apply a high-temperature paint to the metal parts to protect them from heat damage.
Cleaning the old-fashioned electric grill before restoration
The first step in restoring an old-fashioned electric grill is to clean it thoroughly. Use a wire brush to remove any rust or flaking paint from the surface of the grill. Use a scraper to remove any stubborn stains or caked-on debris. Once you’ve scraped off as much as possible, use a heat gun to melt away any remaining debris. Be careful when using the heat gun and ensure that you do not melt any of the grill’s plastic components. Finish off by sanding the surface to create a smooth finish.
It is important to note that before starting the restoration process, you should ensure that the electric grill is unplugged and disconnected from any power source. This will prevent any accidents or injuries while cleaning and restoring the grill. Additionally, it is recommended to wear protective gloves and eyewear to avoid any harm from the cleaning chemicals or debris. Safety should always be a top priority when working with electrical appliances.
Disassembling the old-fashioned electric grill for restoration
The next step in restoring an old-fashioned electric grill is to disassemble it. Begin by removing the grill’s heating elements and thermostat control. Use a screwdriver to detach any screws or bolts that hold the components in place. Place the components in a safe place where you can access them easily during repair or replacement.
Once you have removed the heating elements and thermostat control, it’s time to take apart the grill’s housing. Carefully remove any screws or bolts that hold the housing in place. You may need to use a pry tool to gently separate any clips or connectors that hold the housing together. Be sure to keep track of all the pieces and hardware as you remove them.
After you have disassembled the grill, take a close look at each component to assess its condition. Look for any signs of wear or damage, such as frayed wires or rusted metal. If any parts are damaged beyond repair, you will need to replace them. Otherwise, you can clean and restore the components to their original condition before reassembling the grill.
Identifying damaged or worn-out components in an old-fashioned electric grill
Once you have disassembled the grill, inspect each of the components carefully to identify any damage or wear and tear. Check if the heating elements have any broken wires or damage to the internal heating components. Inspect the thermostat control to ensure it is in good condition and accurately measures temperature.
Another component to check is the power cord. Look for any frayed or damaged wires, and ensure that the plug is securely attached. If the power cord is damaged, it should be replaced before using the grill again.
Additionally, inspect the grill grates for any signs of rust or corrosion. If the grates are damaged, they should be replaced to prevent any potential health hazards from rust or metal fragments.
Replacing or repairing damaged components in an old-fashioned electric grill
If you identify any damaged or worn-out components during inspection, it’s time to repair or replace them. Purchase replacement components if required or use a soldering iron to fix any broken wires or heating components in the heating elements. If the thermostat is faulty, replace it with a new one.
It’s important to note that before attempting any repairs, make sure to unplug the grill and let it cool down completely. This will prevent any potential accidents or injuries. Additionally, if you’re not comfortable with repairing electrical components, it’s best to seek the help of a professional.
Regular maintenance can also help prevent damage to your electric grill. Make sure to clean it after each use and store it in a dry place. Avoid using abrasive cleaners or scrubbers that can damage the heating elements or other components. By taking these steps, you can extend the lifespan of your electric grill and ensure that it continues to function properly for years to come.
Refurbishing the exterior of an old-fashioned electric grill
Now that you’ve replaced or repaired the internal components, it’s time to give the grill’s exterior a facelift. Choose the color of paint that you want for your grill and apply primer to cover the surface. Allow the primer to dry before applying the final coat of paint. Use a paintbrush or roller to apply the first coat and cover the entire grill’s surface. After the first coat dries, add another, and repeat the same process until the color is smooth and even.
It’s important to note that before painting, you should clean the grill’s exterior thoroughly. Use a wire brush to remove any rust or loose paint, and then wipe the surface with a damp cloth to remove any debris. If there are any dents or scratches, you can use a filler to smooth out the surface before painting. Once the paint is dry, you can add any finishing touches, such as new knobs or handles, to complete the grill’s transformation.
Restoring the heating elements of an old-fashioned electric grill
Once you’ve refurbished the exterior of the grill, it’s time to put it back together. Reattach the heating elements and thermostat control and make sure they are secured firmly in place. Ensure all the wires are connected properly and that all screws are tightened securely.
Before turning on the grill, it’s important to check the heating elements for any signs of damage or wear. If you notice any cracks or breaks in the elements, they will need to be replaced before use. You can purchase replacement heating elements from most hardware stores or online retailers.
Once you’ve confirmed that the heating elements are in good condition, it’s time to test the grill. Plug it in and turn it on to the lowest setting. Allow it to heat up for a few minutes and then check the temperature with a thermometer. If the temperature is not reaching the desired level, you may need to adjust the thermostat control or replace it altogether.
Tips for reassembling the restored old-fashioned electric grill
As you reassemble the restored grill, remember the order in which the parts were disassembled. Use the manual that came with the grill to ensure each component is properly connected, and all parts secure.
Testing the restored old-fashioned electric grill before use
Before using the grill again, it’s essential to ensure that it is in perfect working condition. Plug the grill into a power source and turn it on. Allow the grill to preheat and to check that the temperature setting is accurate. If everything is working correctly, you can start cooking on the restored grill.
Maintaining and caring for a restored old-fashioned electric grill
After restoring the grill, proper maintenance is essential to maximize its lifespan. Always follow the manufacturer’s instructions on how to care for the grill. Keep the grill clean and free from debris that can interfere with its performance.
Conclusion and final thoughts on restoring an old-fashioned electric grill
Restoring an old-fashioned electric grill can be challenging, but it is also rewarding. Through this guide, we hope you’ve learned how to restore your old grill successfully and confidently. So take out your old-fashioned electric grill and get started on restoring it. Not only will it help you save money, but it can also be an enjoyable project that you’ll like bragging about in future barbecue parties.